Sunday, August 31, 2014

How to Poach an Egg: Eggs Benedictish

My fiancé thinks I'm a pretty good cook.  But there were, he told me, two things I needed to learn to make like his grandmother.  Chicken and Dumplings, and Eggs Benedict.  Now, it turns out that his grandmother makes a variant on eggs benedict.  Instead of hollandaise sauce (made with eggs and lemon, which surprises me) she makes a cheese sauce, because, "no one [in the family] will eat hollandaise."  I was like, "I can do that!…  Except the egg-poaching.  I can't poach eggs."  I had tried once, just to do it, and, um, I wound up with egg-drop soup and a boiled yolk.  It was very sad.  So when we went to spend a week with his family, eggs Benedict were on the menu.


Eggs Cheesey-Benedict
Butter
Flour
Milk
Velveeta, cubed
Ham, sliced thin 
English Muffins, split
Eggs


I think it's best to begin with the sauce:  it's a roux-based cheese sauce, so begin by combining flour and butter-- about equal parts of each.  For a small batch (3 cups), use about 1 heavy Tbsp, we were making enough for about 11 people.  Also, leftover sauce keeps well, and is good on pasta or potatoes or broccoli…  anywhere you might want cheese!  You can do this in a microwave-- combine them in a large microwave-safe bowl, and microwave until the butter is melted.  Mix together, and add milk.  My fiancé's grandmother has this cool non-whisk that will get lumps out of anything, so she goes ahead and adds a few cups in 1 go; those of us without them must either risk lumpiness (not the end of the world), or add a little bit of milk, heat, stir until completely combined, and repeat over and over.  But heating and stirring will get it combined and thickened into a sauce; if too thick, add more milk.  Once you've got it more-or-less as thick as you'd like, add the velveeta.  Heat and stir, until everything is melted into a uniform sauce.  You may need to add milk again at this point to thin it a little.

Toast up your ham right now.  Just put it in a (buttered for flavor and non-sticking) pan and warm it up over low heat.  I like a little browning, so I might turn the heat up a bit; grandma doesn't, so she just keeps it at the lowest setting while she does everything else…

Once you have your sauce how you want it, put a pan of water on the stove.  You want to get it to just about (but not quite) boiling.  While this is heating, toast and butter your English muffins.  Once the pan is to the almost boil, reduce the heat to keep it that way.  You may see bubbles all around the pan, but they must not actually be rising to the surface.  Carefully slip the eggs into the pan.  Grandma just breaks them right over the water's surface; other places I've seen people suggest cracking them into a bowl and pouring them in.  The goal is to be smooth and ease them into the water.  Let them sit there until done.  When are they done?  Well, first look for the white to be white: you shouldn't be able to clearly see the yolk. At left, the yolks on the right-hand side of the pan are almost there; the center are just added.  Then gently scoop one out (use a slotted utensil).  Give it a little shake.  It should have some jiggle to it, but should not be wobbling all over the place.  Think bread pudding, not jello.

To serve: place the muffins on a plate, top with a slice of ham, a poached egg, and a generous scoop of sauce.  Yum!


Sunday, August 3, 2014

Tunnel o' Fudge

We've established by now that I REALLY like cookbooks.  So it shouldn't be too surprising that I got excited about Shirley O. Corriher's BakeWise (ISBN:9781416560784).  This is a fantastic compilation of a range of baked goods, including breads, desserts, and little bites.  The best part about it, though is Corriher's approach-- she discusses the science behind the recipes.  There are general sections of science-- such as the introductory discussion of how ovens work or the chapter on steam-leavened goods-- and little blurbs at the beginning of each recipe pointing out which phenomena apply.  The following recipe (which was published in the New York Times along with an article explaining the process she used to perfect it) highlights how brown sugar gives a fudgy flavor, how tons of sugar will prevent a cake (or any baked good) from setting properly, and (although it's not technically a scientific thing) the difference nuts can make in a recipe, "roasted nuts make this cake.  Don't leave them out."  (Sorry folks with allergies.)

Also in the introduction to the recipe, Corriher explains the history of this cake.  Apparently it was all the rage in the 1960s (missed that decade, sorry), so much so that when Pillsbury discontinued the icing that was used to make it, they got swamped with angry letters (if the movies are correct, these were sent by angry bouffant-styled housewives dressed like Audrey Hepburn or Mary Tyler Moore.  I like this image.)  So they released a recipe to make the cake without their icing.  (They must've been REALLY set on discontinuing it!)  It has to be a bundt cake, because the center is going to remain gooey.  The edges will cook nicely though, and you'll be left with a tunnel-like ring of fudginess.

Improved Tunnel of Fudge Cake
2 1/2 C mixed walnuts and pecans (in pieces)
1 1/4 C plus 2 Tbsp unsalted butter
3/4 tsp salt
1 C sugar
3/4 C (packed) dark brown sugar
1 tsp vanilla
1/3 C canola oil
Yolks of 2 large eggs
2 C confectioners' (a.k.a. powdered) sugar
3/4 C natural cocoa (NOT Dutch-processed/alkalized)
4 large eggs (whites and yolks!)
2 1/4 C flour
Extra powdered sugar for dusting

Move a rack in your oven to the bottom 1/3 of the space (and make sure your pan will fit on it), and place a baking stone on it.  Preheat the oven to 350˚F.  [I don't have a baking stone.  Yet.  They improve the ability of the oven to maintain an even temperature, thereby optimizing your making.  It's a good thing, especially for this recipe, which relies entirely on the accuracy of your oven, but you can get by without one.  You're just gambling.]

Roast the nuts on a baking sheet for ~10 minutes, then combine in a bowl with 2 Tbsp butter and 1/4 tsp salt.  Cool, chop coarsely, and set aside.  Grease your Bundt pan.

Beat the 1 1/4 C butter until soft and fluffy.  Add the regular sugar, then the brown sugar, and continue to beat until creamy and light.  The tricky part here, though, is that you need to keep it cool.  Since I don't have a reliable mixer, I had to do this by hand.  I warmed the butter to get it started, but once I got it to a fluffy stage, I cooled it again.  Just pop it in the freezer for a few minutes.

Beat in the remaining 1/2 tsp salt and vanilla.  Add the oil and yolks.  Stir in the powdered sugar BY HAND (you know, unless you want your kitchen to be home to a sweet cloud that really ought to have been in the cake), as well as the cocoa powder.  Still working by hand, stir the eggs in one at a time, until just blended.

Pop your bundt form into the oven for about 5 minutes.  Stir together the flour and nuts.  Fold the resulting mixture into the batter, and pour into the warmed [hot] bundt.  Bake for 45 minutes.  This is where the accuracy of your oven matters-- the center will not set, so you can't test for doneness with this cake.  So cross your fingers, say a prayer, or just be optimistic, and pull it out after 45 minutes.  Due to steam-leavening, there is an air pocket in the center.  This is not ideal.  While the cake is cooling and still in the pan, gently press the inside and outside edges down all the way around the cake.  The cake should be left in the pan until completely cooled (about 2 or 3 hours).  Loosen the cake from the edge of the pan (and curse whoever thought of the silly flutes that look so pretty but make it hard to loosen anything from the pan!).  Corriher uses a thin knife.  I used my cake tester.  Flip the cake out of the pan and onto a plate, platter, or cake-saver base.  Sprinkle with powdered sugar.

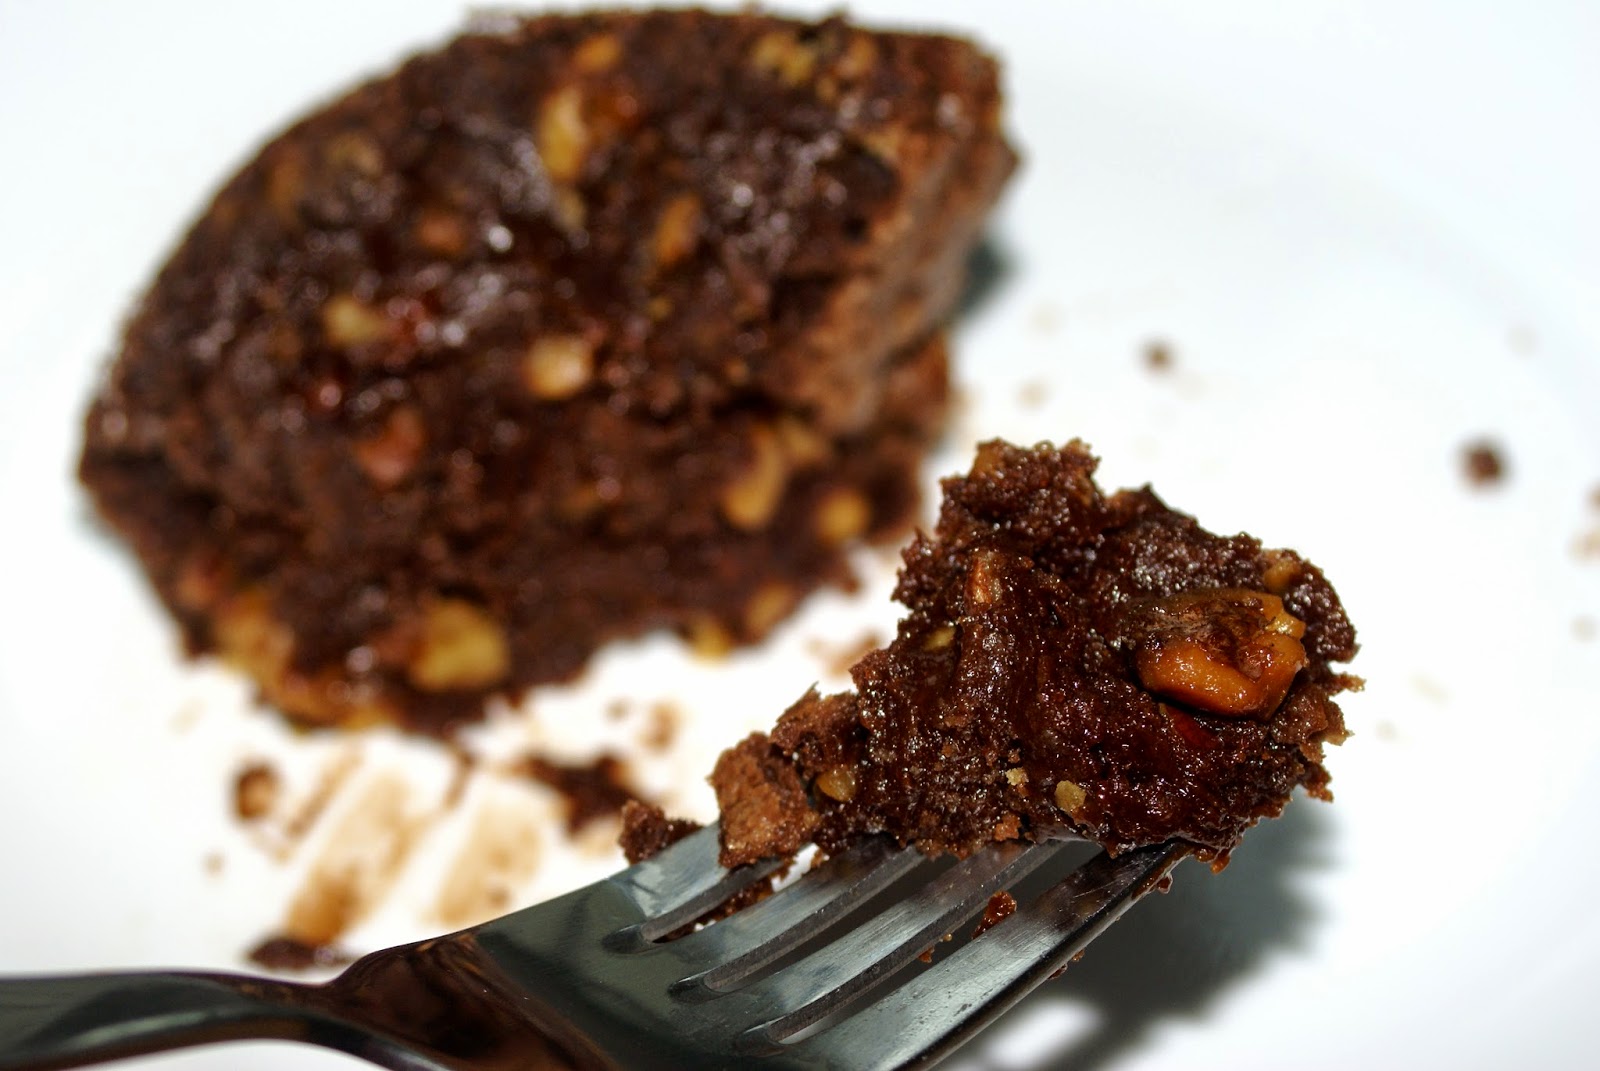
I took a risk with this cake and my probably (almost certainly) not properly-temperatured oven; I've had issues baking things before.  But I wanted to try it so badly, I forged ahead.  And I'm glad I did.  It didn't turn out quite the way I expected, but it had a delicious, rich flavor.  My fiancé, who only likes about 2 types of cake, liked it, too!  It was almost cookie-like on the outside, and rich and gooey inside, almost like a brownie.  It was hard for me to eat just one piece.  


Monday, July 14, 2014

Summer Rolls et al.

Summer rolls are not to be confused with their ubiquitous counterpart, the spring roll.  I think most Americans (I can't really speak for other nations) are more familiar with the spring roll, and many people confuse them or use them interchangeably.  It's kind of like the macaroon/macaron thing (THEY ARE NOT THE SAME!-- I hope to blog about them sometime in the future).  I suppose it's a little less egregious; some people consider summer rolls to be a type of spring roll, fairly unique to Vietnam.  In Hawaii, the difference is cooking.  Spring rolls are fried; summer rolls are not, and feature fresh/minimally cooked ingredients.  I'm all about mnemonics, so I keep them straight this way: once the summer gets really hot, you don't want to fry anything.

I hadn't encountered summer rolls until I moved out to Hawaii.  I loved them instantly.  I like the thin, melt-in-your-mouth rice wrapper and fresh ingredients.  They're crisp and refreshing, and my favorites come with spicy peanut dipping sauce. Yum!  They can be made with a variety of ingredients; I adapted a recipe published in the Honolulu Star-Advertiser to make mine.

To go with the summer rolls, my fiancé and I made up a whole bunch of small bits to eat for dinner: deviled eggs (see previous blog), stuffed peppers (I've blogged a recipe before, but I'll include what we did this time), and bacon-chickenskin skewers.

Summer Rolls
1 Tbsp vinegar
1/2 tsp sugar
1/2 C julienned, matchsticked, or grated carrots
1 1/2 C chopped red cabbage (napa cabbage was called for, but red was easier to find/use leftovers of)
1/4 C matchsticked bell peppers
1/4 C matchsticked radishes
2 Tbsp scallions
8ish cooked shrimp, halved the long way
Summer Roll Rice Wrappers

Combine the vinegar and sugar with a pinch of salt, and stir until everything is dissolved.  I recommend heating it slightly, to help everything dissolve.  It'll also help wilt the cabbage a bit, because red cabbage is quite sturdy (more so than napa-- they're not really interchangeable; adapt!).  Because the next thing is to toss the vinegar mixture with the cabbage and carrots.  Once you've done that, get a large dish of hot water (I used a pie pan) and soften a wrapper by dipping it in there. Working on a damp paper towel, lay out the wrapper, and put a mound of cabbage on it. Layer on the bell peppers, radishes and scallions, too, along with 2 pieces of shrimp.  Roll by folding up the bottom, then the sides, and rolling toward the top, keeping the roll tight.  Keep damp (but not wet) until serving.  Repeat until you're out of ingredients.  Serve with dipping sauce: I had some Thai chili sauce left over from the root beer pulled pork (see previous blog), so I just used that.

Stuffed Peppers II
10ish mini bell peppers
3/4 C crumbled Queso Fresco
1/8 C bread crumbs
1/8 C chopped onions

Combine the queso fresco, bread crumbs, and onions.  Halve and clean the peppers, and fill with the cheese mixture.  Broil about 5-10 minutes until the tops are lightly browned.  If desired (or if you have extra bacon leftover from the skewers), wrap in bacon prior to broiling.

Bacon-Chickenskin Skewers
Bacon
Chickenskin, cut into strips
Ground sage

Season the chickenskin with sage, salt, and pepper.  Place a strip of bacon on top and thread/weave onto a skewer.  Pan-crisp over medium-high heat for ~5 minutes, then finish in the broiler.

Going back to the summer rolls: they're pretty versatile, in that you can put in what you want/ what you have on hand (obviously, I used red cabbage instead of napa, which is a rather significant difference).  I feel like these might be a good way to use up some leftovers, if you could appropriately season them.  (Chop up some teriyaki chicken, toss it with cold rice, cabbage, carrots…)  There's a perfect moisture level for keeping these until serving that I am still not quite sure about; too wet will make the wrapper stick to everything; too dry and it'll crack apart.  Don't stress too much about it, and be prepared to tweak your set-up. 

The peppers are super-simple, but delicious.  My fiancé loves them.  He mastered the making of them pretty quickly, which makes life easy for me!  We eat them as sides, snacks, appetizers, and occasionally even have leftovers.  They reheat nicely.

The skewers were a bit tricky for me; the broiler finish was sort of a last-ditch effort on my part to get that chicken skin crisped through, but it worked quite well. I'd still like it crispier, so I'm going to need to work with it some more, but it's a decent consistency as presented here.  It makes the skewers that much more indulgent to me; I've always loved the richness of the skin on poultry.


Sunday, July 6, 2014

Sweet Potato Fries and Stuffed Burgers

Alrighty, this won't be too original or anything,  but it was yummy nonetheless.  And really, burgers are always a great food to make, especially if you have friends coming over.  I found the recipe for the fries  on Pinterest, and couldn't wait to try them.  I also created a couple sauces to go with the fries (and/or on the burgers).

Sweet Potato Oven-Fries
1 or 2 medium sweet potatoes
Bacon, cooked
~ 4 Tbsp Garlic Confit Oil (or olive oil)
1 tsp Chili Powder
1 tsp Ground Cumin
1 tsp Ground Paprika
Salt and Pepper

Peel the potatoes and slice them into french fries. Cut or break the bacon (depending on how crisp you've got it) into pieces.  Place the fries and bacon in a bowl, drizzle over the oil, and toss to coat; sprinkle over and mix in the spices.  Dump onto a large baking sheet and spread out into a single layer. Bake in a 425˚F oven for about 20 minutes until crisp/toasty.

Cheese-stuffed Hamburgers
1.5 lbs ground sirloin
1 tsp worcestershire sauce
2 tsp onion powder
1 tsp garlic powder
1/2 tsp cumin
1/2 tsp chili powder
1 tsp pepper
1 tsp salt
Cheese of your choice (we used babble and colby jack)

Slice the cheese to about 1.5 inches by 1 inch by a quarter inch.  Combine all ingredients except the cheese in a mixing bowl and mix thoroughly.  I recommend using your hands and just squishing it all together; you're going to need your hands to form the burgers, right?  Scoop out a burger-sized portion, then divide in half.  Place a piece of cheese in the center of one half; cover with the other half and flatten into a burger.  (Tip:  Make your burger wider and flatter than you want it to be; it'll contract and thicken as it cooks, and you don't want to have to squish out the juice to make it flatter while cooking.)  Grill or cook in a pan (or on a griddle, I suppose) over medium-high heat.

Spicy ketchup
1/4 C ketchup
1/2 tsp cumin
1/4 onion powder
1/4 tsp pepper
dash crushed red pepper flakes

Combine all ingredients and allow to sit for an hour or so for flavor development.

Creamy Chive Dressing
1 Tbsp mayonaisse
1 1/2 Tbsp milk
1 Tbsp snipped fresh chives
1 clove crushed garlic confit
pinch of salt
1/2 tsp pepper
dash oregano

Combine all ingredients, cover, shake, and allow to sit in the refrigerator for an hour or so for flavor development.

I think my favorite part of this was the spicy ketchup, honestly.  It was so good, and the longer I let it sit, the better the flavor.  It was reminiscent of barbecue sauce in the end.  Tasty!   The chive sauce was a little bit like ranch.  It made a nice cooling contrast with the fries.  The burgers were yummy, too.  My fiancé cooked them, and he's great at that, so they were moist and had a nice crispness/char.  I had issues with the fries-- I did it in two batches and slightly burnt the first (larger) batch.  They were still good, but it struck me as a bit of a bummer.  I was concerned about repeating the mistake, so I erred the other way on the second batch, and they weren't so crisp.  The recipe was great.  I was just distracted and chatting with my friend, and wanted to give the fries a couple minutes more, and then someone asked, "hey what about the fries?" seven minutes later.  But it made for a great dinner, very casual, very fun.


Saturday, June 28, 2014

If a crepe and a quiche had a baby...

My wonderful aunt got me an absolutely fabulous Christmas present this year-- a couple magazine subscriptions, including Simple & Delicious.  NAILED IT!  The recipes are all simple, quick, and no doubt delicious.  When I was flipping through and found a recipe for a puff pancake, I decided that I needed a fancy breakfast for myself.  I had some old candy bars and a ton of super-ripe melon that I wanted to use up, so I opted to use them instead of berries as the recipe instructed.
I was also interested to see how it would turn out.  It was different from any other pancake recipe I've seen.  You make it in a pie pan and bake it, for one.  Also, it has 3 times the sugar and 1/3 the flour of the pancake recipe I normally use.  From reading BakeWise, by Shirley O. Corriher (more on this book in a later blog), I recognized a couple things: the first was steam leavening.  There isn't anything in this recipe that will cause the "puff" other than steam (no baking powder, etc.).  Also, the amount of sugar probably affects the texture.  I can't be sure on that without tweaking the recipe, but I'm reluctant to try that.

Puff Pancakes
1 Tbsp butter
3 eggs
1/2 C milk
1/3 C flour
1/4 tsp salt
3 Tbsp sugar
3 chopped Yogurette bars (or some other chocolate/yogurt candy)
1 C chopped honeyrock/ cantaloupe


Preheat your oven to 400˚F.  Place the butter in a pie plate and put in the oven to heat up.  Whisk together the eggs, milk, flour, salt, and sugar.  Briefly (so it doesn't cool too much) pull out the pie plate, and tilt/swirl so the butter coats the entire surface.  Pour in the batter, and replace in the oven for 10-12 minutes to bake.  While it's baking, sprinkle the melon with a bit of powdered sugar.  The sides should puff up and become slightly brown.  Immediately put the chocolate on the pancake so that it will melt.  Top with the melon, and serve hot and fresh.

Yummy!  The texture, as I suggested in the title, is a lot like a cross between and crepe and a quiche.  This made me think that it would also be delightful with savory components.  I tried this, actually, using cheese, bacon, and bell peppers, and it was so yummy.  My fiancé thought so, too.  Sadly, I have no photo for this.  But the point I'm trying to make is that it is deliciously versatile; you can put any number of toppings on this.
It really does need to be served right away, not just kept warm.  I wanted my chocolate to melt, so I took out the pancake, and put it back almost right away.  It still deflated.  That said, the puff-look is the only thing affected.  It actually keeps well in the fridge, so if you have any left over (you know, if you don't eat the whole thing yourself, or share it with people), you can enjoy it the next day.


Sunday, June 22, 2014

Need a Vegan Dip?

While I had the Greek cookbook, I decided I ought to look at how Mr. Psilakis made tsatsiki.  I cannot get enough of that.  I didn't actually make it, though, because I didn't have a need for it, and I didn't have time to go to Whole Foods to get the kind of yogurt that I like.  But on the opposite page was a recipe for eggplant spread.  It used the garlic confit, and one of the serving/use suggestions included the chickpea confit.  Well, why not?  Bonus: eggplant.  I like to try new things with eggplant, because I've had some great eggplant, but personally find it tricky.  I want to get it right!  I want to get somewhere where I can say, "oh, look at that beautiful eggplant!  I know just what to do with it!"  This recipe is a great step in that direction.

Eggplant Spread
1 large Eggplant
1 Tbsp Olive Oil
6 Shallots
2 cloves Garlic
1 mini red bell pepper
1 mini yellow bell pepper
1 Tbsp lemon juice
12 cloves Garlic Confit 
1/4 C red wine vinegar
1/4 C olive oil

Preheat the oven to 350˚F, wrap the eggplant in foil and roast it in the oven until very soft.  For me, it took about an hour and a half.  Let it cool enough that you can touch it without blistering your fingertips off, then peel the eggplant.  I cut it into large pieces.  Line a colander with, if you have it, a double thickness of cheesecloth. I didn't, so I used a whole bunch of paper napkins instead.  Place the eggplant into the lined colander to drain overnight.

When ready to resume cooking, dice the shallots, smash and mince the garlic cloves, use a toaster oven to roast the bell peppers, and cut the red one into strips and the yellow one into smaller pieces (it makes things a little more visually interesting).  Warm the olive oil over medium-high heat, and cook the shallots until tender.  Add the garlic and bell peppers and cook about a minute more.  Remove from heat and deglaze the pan with the lemon juice.

In a food processor or blender, combine half the eggplant and the garlic confit.  Purée until smooth, then add the red wine vinegar.  Slowly drizzle in the olive oil while blending constantly (you're making an emulsion here).

Chop the remaining eggplant, and combine with the shallot mixture and eggplant purée in a good-sized bowl.  Season liberally with salt and pepper.

This dip has an amazingly creamy mouthfeel and taste.  I was surprised; I double-checked the recipe to make sure that I hadn't forgotten adding a dairy component at some point.  It was delicious.  I ate it for breakfast, lunch, and dinner, usually spread on top of some beer bread, although I also used it as a dip for veggies and chips.  It probably would have been a nice addition to sandwiches, although I never got that far.  The biggest criticism I had of it was that it is not very pretty.  It is (as you can see) this odd brownish color.  I know that's just the color of eggplant, but it makes it harder to get people to try something new.

The serving suggestion I took advantage of involved combining 1 C eggplant spread and 1 C chickpea confit (drained).  Chop them together on an easily-wiped-down cutting board, then transfer them into a bowl.  Add an egg and about 1/3 C breadcrumbs (enough to make it a texture that can be formed into a ball).  Form into small fritters, dredge in flour, and deep-fry until crisp. 

The fritters were also fantastic.  Like all fried things, they were best hot, although they were so flavorful I enjoyed them cold, too.  Both of these recipes are my new favorite way to eat eggplant.


Monday, June 9, 2014

Chickpea Confit

My last blog was about garlic confit, a recipe I found in How to Roast a Lamb.  While I was doing the whole confit thing, I went ahead and made chickpea confit, too.  There was a bit of irony to this recipe, because I used canned chickpeas, which are already shelf-stable, and made what is essentially a preserve out of them.  But it's another kind of deliciousness, so let's not get hung up on that.


Chickpea Confit (By Michael Psilakis)
1 head Garlic
1 tsp cumin
1 tsp mustard seeds
28 oz. canned chickpeas (aka garbanzo beans)
Kosher salt
Pepper
Canola Oil
Olive Oil

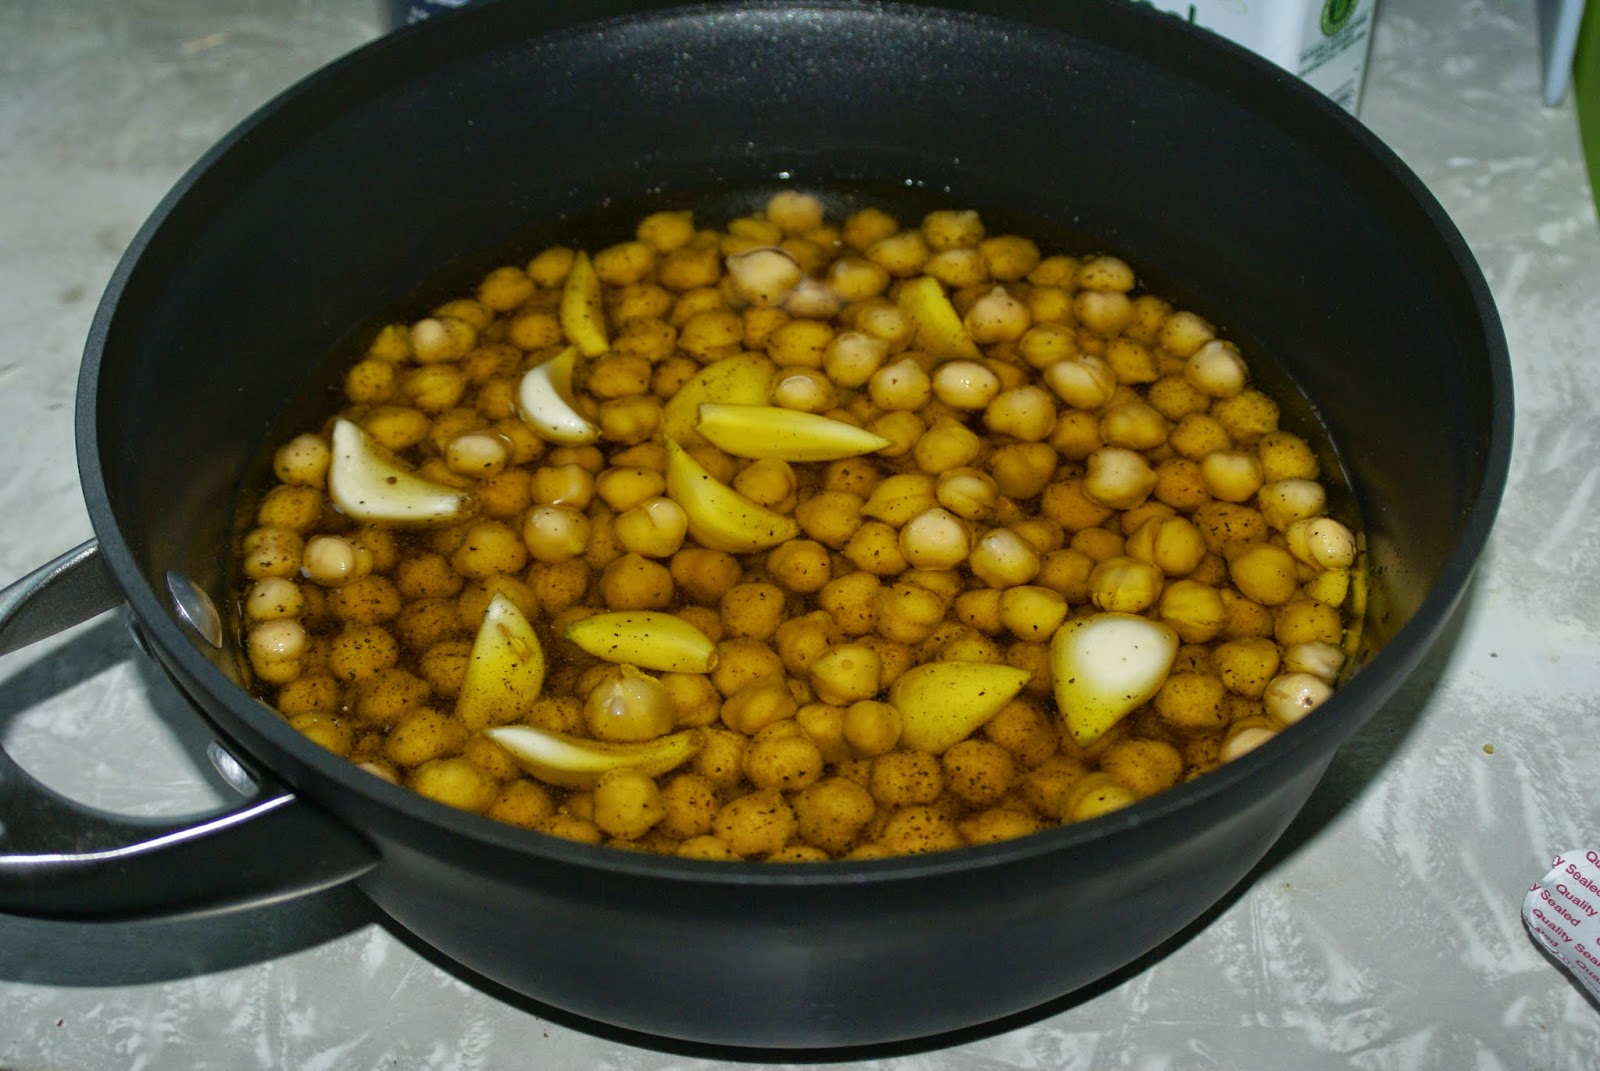
Separate and peel the garlic cloves, and rinse and thoroughly drain the chickpeas.  Preheat the oven to 325˚F.  Combine the garlic, cumin, mustard seeds, and chickpeas in a heavy, oven-safe pot.  Season with salt and pepper, and pour in equal amounts of olive and canola oils until everything is just barely covered.  Place the lid on the pot and cook about 45 minutes, until "aromatic but not browned."

Sterilize a jar.  After the chickpeas are finished, let them cool and transfer them and their oil into the jar. Store in the refrigerator, and enjoy the delicious chickpeas and cumin-flavored oil.

When I decided to make this, I wondered what I would do with a bunch of chickpeas.  I had a vague idea that I could make some amazingly awesome hummus.  I still haven't done so (I've gotten hung up on tahini), but I've made excellent salads.  The oil is great for a vinaigrette, and the chickpeas themselves are a nice topping to a salad.  Make your salad even fancier by adding home-made croutons toasted in the oil.  The chickpeas are also ideal for fritters or burgers, bringing rich flavor that they don't necessarily have.

Probably my favorite thing that I did with these, though, was a fresh tomato salad.  I cut up some tomatoes and some fresh, mild-flavored cheese (I used Babybel, because I had some, but mozzarella or queso fresco would be equally nice).  I tossed them together with some of the chickpea confit, a bit of balsamic vinegar, a tiny drizzle of oil from the garlic confit (just to give it a little more garlic flavor), and some thyme.  It was delicious, healthy, and a great side dish or snack.