Tuesday, September 23, 2014

Savory French Toast

My husband and I bought a beautiful baguette on a whim, and I decided that since I had some lovely French bread, I would make some lovely French toast.  And then I opened my spice cabinet and got to thinking-- why is French Toast always sweet?  Usually eggs are savory, and they're what really make French Toast.  So why can't French Toast be savory?  To that end, I didn't grab cinnamon, and made up an intentionally not-sweet French Toast.


Savory French Toast
4 slices of baguette-- slice on an angle for more surface area
1 egg
2-3 Tbsp cream
pinch salt
1/8 tsp pepper
dash cumin
dash coriander
1/8 tsp thyme
1/2 Tbsp bacon fat (or butter)
Parmesan cheese

Combine everything from the eggs to the thyme on a plate, and stir  to combine.  Set the bread slices in the plate and allow to soak up the mixture for about a minute.  Flip the bread and allow it to soak up the remaining mixture; you may want/need to move the bread around to mop up the mixture.  
Melt the bacon fat in a pan over medium-high heat.  Place the baguette pieces in the pan and sprinkle with parmesan cheese, then allow to cook until just slightly browned; flip it over and repeat.  You'll need to flip the toast one more time to stick the second sprinkle of parmesan.  It'll need only 15-30 seconds.  Serve hot.

My husband passed on this; as I started typing it up, he got disappointed.  Which, in my opinion, he should well be.  It was delicious.  Salty and flavorful, it was a nice alternative to either a sweet breakfast or eggs.  I paired it with a little bit of savory blueberry sauce I had leftover from some lamb, which served as a lovely alternative to syrup to really complete the savory breakfast.  


Friday, September 12, 2014

The afore-mentioned bog breakfast

This blog is a bit of a cheat.  If you read my last blog, it was about "bog," and I mentioned that the only thing my in-laws love more than a good bog party is eating the leftovers for breakfast.  Oh, and it is yummy!  It's just not terribly detailed.  You may have been able come up with this yourself.

Bog Breakfast
Leftover bog
Eggs

Begin by prepping your leftovers.  We do this right after the bog, as part of the clean-up.  Basically, crack open all the crab legs, peel the shrimp, and cut the corn off the cob.  Additionally, you'll want to dice the shrimp and break the potatoes and sausage down into bite-sized pieces.

Now, there are a couple ways to do this:
1) Combine EVERYTHING (including the eggs) and cook it.  This results in what I mistakenly grew up calling an omelette.  It's really just eggs scrambled with deliciousness.  (What so many omelets turn into…)

2) Warm the leftover bog mixture gently (low heat--overcooked shrimp is not pleasant).  Fry up some eggs and serve them on the side.  Add toast, too, if you like.  This is probably the preferred way in our family.  It gives us a little more control over how much of what we're eating.

Breakfast is the most important meal of the day.  [Unless it's lunch or dinner time.]  And this is a FABULOUS breakfast.  Who doesn't want to wake up to shrimp, crab, potatoes, and all that delicious?  This is even better than pancakes.  


Saturday, September 6, 2014

Bog-- not just for growing cranberries

For my husband's birthday, he decided that he wanted a bog party.  We did not, as my lucky duck sister had the chance to do, go to Ireland and jump into a peat bog (although, really, I find this an odd activity), but instead had what might otherwise be called a crab (or shrimp or clam or…) boil.  I have heard of such things, but never yet done them.  Andrew had been telling me about how awesome it was, his mom had been telling me that we ought to do one to celebrate our wedding…  I'd been hearing a lot about this magical "bog", but not tasting!

The recipe comes from some relatives in their family, and they called it "Buford's Bog".  No idea who Buford is.  Someone who likes food, I guess. Below is how my mother-in-law has it written down.

[Buford's] Bog
~20 qts (5 gallons) water (and a pot big enough to hold it)
3 lemons
1/2 lb salt
1 oz. black pepper
1 oz. cayenne pepper
2 oz. tabasco
2-3 bags Zataran's Crab Boil
6oz. Old Bay Seasoning
1/2 lb shrimp per person 
1/2 lb small red potatoes per person
1/6 lb onion per person 
1/2 lb Polish sausage per person
1 ear of corn per person
1/2 lb crab per person

The italicized ingredients are a per person ESTIMATE.  If it looks like way too much food, it may well be.  Know your budget.  Know the people you are cooking for.  Also know that leftovers make an excellent breakfast that is more beloved in my husband's family than the bog itself.

Begin by bringing all the water to a boil.  Use a propane-fired turkey fryer.  (This is an OUTDOOR meal.)  While someone is manning the propane burner, half the lemons, half or quarter the potatoes, and  chop the onions int rough wedges.  Break the corn cobs in half, and cut the sausage into large hunks.

Add the lemons, salt, both kinds of pepper, tabasco, crab boil (keep the bags intact; I didn't know you were supposed to), and Old Bay to the boiling water.  If you have a colander-type insert for your giant vessel (no idea where they get these, but they have it!) put that in afterward.  Add the potatoes and onions and cook for 20 minutes.  Then add the sausage and corn, and cook another five minutes.  Add the crab, and give the whole pot another five minutes.  Finally, add the shrimp, and cook a few minutes more (until the shrimp is cooked-- it'll be pink and curled).

This is where your colander insert becomes invaluable.  If you've got one, just lift it out (use caution, it's hot and dripping hot liquids!), and carefully dump it into a large (very large in our family) serving bowl.    It helps to have the bowl right next to the pot.  If you haven't got the insert, you'll have to be a little more creative.  And quick.  I would use the largest slotted utensil I could find.  I might even try scooping either with or into a regular colander, since that might be faster.  Probably make it a multi-person job.

Grab your nutcrackers/shellfish-splitters, forks, tons of napkins, and plates.  Use tongs to help yourself to a little bit of everything.

This can be done in batches, if it won't all fit at once (ours certainly wouldn't).  Do a little bit of everything in each batch, so it all works together, and so hungry folks can eat everything while waiting for the next installment.  We also spiced in batches.  The second batch, then is spicier.  

Feel free to swap out ingredients as you are able or interested.  Be careful, though, if using unfamiliar ingredients.  My husband's aunt was very excited to try some "Slap Yo' Mamma" crab boil seasoning she'd bought at a gift, bait, and tractor supply store down in Louisiana.  We thought we'd use just a quarter of the bag, and one less Zataran's, and maybe that would even out.  Nope.  Lesson learned: the good people of Louisiana don't tone down their spices for tourists. 

We had a couple family members with shellfish allergies.  Fortunately not so bad that they couldn't be around us, but we had to accommodate.  We separately cooked some potato, sausage, and corn for them.  Since they're kids, we didn't want it to be spicy for them anyway, so they we weren't stuck trying to figure out how to flavor it.  But probably add some Old Bay and pepper (both kinds) for flavor if so desired.

Finally, a tip for purchasing: split the costs.  Put someone in charge of crab, someone in charge of shrimp and sausage, someone in charge of spices, someone else could get produce… However it makes sense to divvy it up so no one person is stuck with a triple-digit bill.

I was really thrilled.  This definitely lived up to expectations.  It was fun to make, fun to eat, and just made the whole party fun and casual and relaxed.  There's plenty of time to talk and hang out while it's cooking, or while you're cracking open crab or peeling apart your shrimp.  Everyone's digging into seafood and veggies with their hands, so it's hard to not feel at ease (possible downside: it is also harder to photograph everything).   It's amazingly flavorful, very filling, and the crab makes it fabulously indulgent.  I really find myself at a loss for words, it is that good.  Make it.  You won't be sorry.


Sunday, August 31, 2014

How to Poach an Egg: Eggs Benedictish

My fiancé thinks I'm a pretty good cook.  But there were, he told me, two things I needed to learn to make like his grandmother.  Chicken and Dumplings, and Eggs Benedict.  Now, it turns out that his grandmother makes a variant on eggs benedict.  Instead of hollandaise sauce (made with eggs and lemon, which surprises me) she makes a cheese sauce, because, "no one [in the family] will eat hollandaise."  I was like, "I can do that!…  Except the egg-poaching.  I can't poach eggs."  I had tried once, just to do it, and, um, I wound up with egg-drop soup and a boiled yolk.  It was very sad.  So when we went to spend a week with his family, eggs Benedict were on the menu.


Eggs Cheesey-Benedict
Butter
Flour
Milk
Velveeta, cubed
Ham, sliced thin 
English Muffins, split
Eggs


I think it's best to begin with the sauce:  it's a roux-based cheese sauce, so begin by combining flour and butter-- about equal parts of each.  For a small batch (3 cups), use about 1 heavy Tbsp, we were making enough for about 11 people.  Also, leftover sauce keeps well, and is good on pasta or potatoes or broccoli…  anywhere you might want cheese!  You can do this in a microwave-- combine them in a large microwave-safe bowl, and microwave until the butter is melted.  Mix together, and add milk.  My fiancé's grandmother has this cool non-whisk that will get lumps out of anything, so she goes ahead and adds a few cups in 1 go; those of us without them must either risk lumpiness (not the end of the world), or add a little bit of milk, heat, stir until completely combined, and repeat over and over.  But heating and stirring will get it combined and thickened into a sauce; if too thick, add more milk.  Once you've got it more-or-less as thick as you'd like, add the velveeta.  Heat and stir, until everything is melted into a uniform sauce.  You may need to add milk again at this point to thin it a little.

Toast up your ham right now.  Just put it in a (buttered for flavor and non-sticking) pan and warm it up over low heat.  I like a little browning, so I might turn the heat up a bit; grandma doesn't, so she just keeps it at the lowest setting while she does everything else…

Once you have your sauce how you want it, put a pan of water on the stove.  You want to get it to just about (but not quite) boiling.  While this is heating, toast and butter your English muffins.  Once the pan is to the almost boil, reduce the heat to keep it that way.  You may see bubbles all around the pan, but they must not actually be rising to the surface.  Carefully slip the eggs into the pan.  Grandma just breaks them right over the water's surface; other places I've seen people suggest cracking them into a bowl and pouring them in.  The goal is to be smooth and ease them into the water.  Let them sit there until done.  When are they done?  Well, first look for the white to be white: you shouldn't be able to clearly see the yolk. At left, the yolks on the right-hand side of the pan are almost there; the center are just added.  Then gently scoop one out (use a slotted utensil).  Give it a little shake.  It should have some jiggle to it, but should not be wobbling all over the place.  Think bread pudding, not jello.

To serve: place the muffins on a plate, top with a slice of ham, a poached egg, and a generous scoop of sauce.  Yum!


Sunday, August 3, 2014

Tunnel o' Fudge

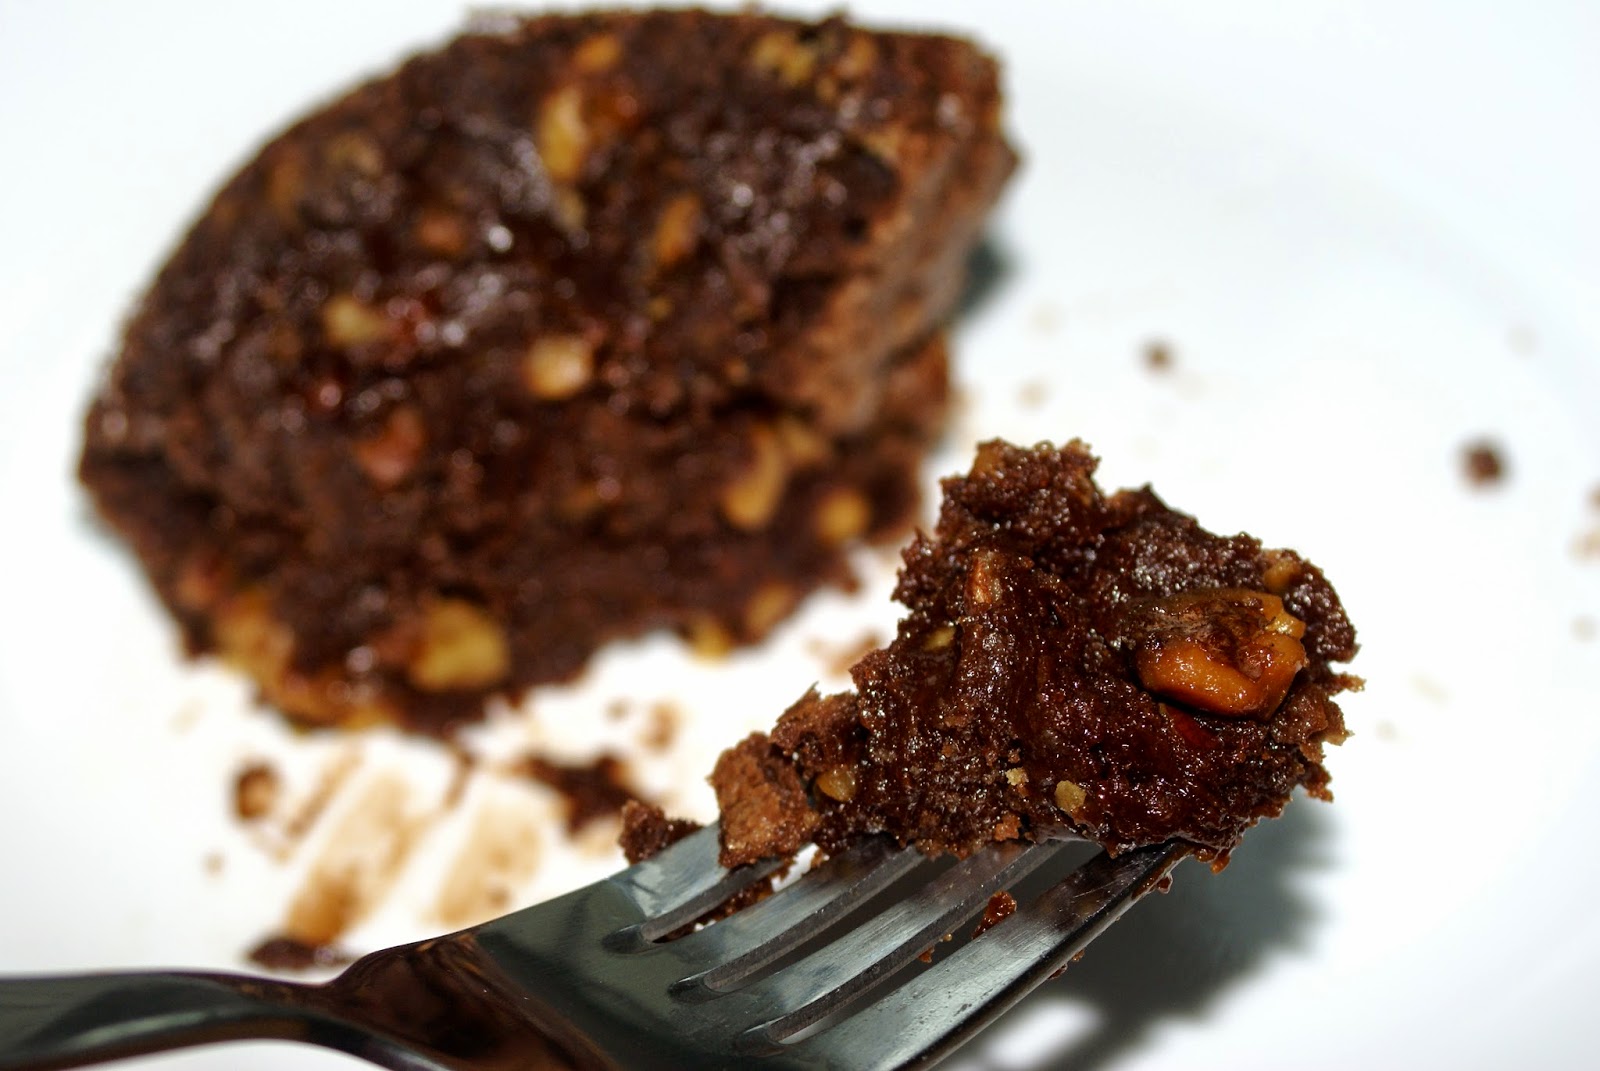
We've established by now that I REALLY like cookbooks.  So it shouldn't be too surprising that I got excited about Shirley O. Corriher's BakeWise (ISBN:9781416560784).  This is a fantastic compilation of a range of baked goods, including breads, desserts, and little bites.  The best part about it, though is Corriher's approach-- she discusses the science behind the recipes.  There are general sections of science-- such as the introductory discussion of how ovens work or the chapter on steam-leavened goods-- and little blurbs at the beginning of each recipe pointing out which phenomena apply.  The following recipe (which was published in the New York Times along with an article explaining the process she used to perfect it) highlights how brown sugar gives a fudgy flavor, how tons of sugar will prevent a cake (or any baked good) from setting properly, and (although it's not technically a scientific thing) the difference nuts can make in a recipe, "roasted nuts make this cake.  Don't leave them out."  (Sorry folks with allergies.)

Also in the introduction to the recipe, Corriher explains the history of this cake.  Apparently it was all the rage in the 1960s (missed that decade, sorry), so much so that when Pillsbury discontinued the icing that was used to make it, they got swamped with angry letters (if the movies are correct, these were sent by angry bouffant-styled housewives dressed like Audrey Hepburn or Mary Tyler Moore.  I like this image.)  So they released a recipe to make the cake without their icing.  (They must've been REALLY set on discontinuing it!)  It has to be a bundt cake, because the center is going to remain gooey.  The edges will cook nicely though, and you'll be left with a tunnel-like ring of fudginess.

Improved Tunnel of Fudge Cake
2 1/2 C mixed walnuts and pecans (in pieces)
1 1/4 C plus 2 Tbsp unsalted butter
3/4 tsp salt
1 C sugar
3/4 C (packed) dark brown sugar
1 tsp vanilla
1/3 C canola oil
Yolks of 2 large eggs
2 C confectioners' (a.k.a. powdered) sugar
3/4 C natural cocoa (NOT Dutch-processed/alkalized)
4 large eggs (whites and yolks!)
2 1/4 C flour
Extra powdered sugar for dusting

Move a rack in your oven to the bottom 1/3 of the space (and make sure your pan will fit on it), and place a baking stone on it.  Preheat the oven to 350˚F.  [I don't have a baking stone.  Yet.  They improve the ability of the oven to maintain an even temperature, thereby optimizing your making.  It's a good thing, especially for this recipe, which relies entirely on the accuracy of your oven, but you can get by without one.  You're just gambling.]

Roast the nuts on a baking sheet for ~10 minutes, then combine in a bowl with 2 Tbsp butter and 1/4 tsp salt.  Cool, chop coarsely, and set aside.  Grease your Bundt pan.

Beat the 1 1/4 C butter until soft and fluffy.  Add the regular sugar, then the brown sugar, and continue to beat until creamy and light.  The tricky part here, though, is that you need to keep it cool.  Since I don't have a reliable mixer, I had to do this by hand.  I warmed the butter to get it started, but once I got it to a fluffy stage, I cooled it again.  Just pop it in the freezer for a few minutes.

Beat in the remaining 1/2 tsp salt and vanilla.  Add the oil and yolks.  Stir in the powdered sugar BY HAND (you know, unless you want your kitchen to be home to a sweet cloud that really ought to have been in the cake), as well as the cocoa powder.  Still working by hand, stir the eggs in one at a time, until just blended.

Pop your bundt form into the oven for about 5 minutes.  Stir together the flour and nuts.  Fold the resulting mixture into the batter, and pour into the warmed [hot] bundt.  Bake for 45 minutes.  This is where the accuracy of your oven matters-- the center will not set, so you can't test for doneness with this cake.  So cross your fingers, say a prayer, or just be optimistic, and pull it out after 45 minutes.  Due to steam-leavening, there is an air pocket in the center.  This is not ideal.  While the cake is cooling and still in the pan, gently press the inside and outside edges down all the way around the cake.  The cake should be left in the pan until completely cooled (about 2 or 3 hours).  Loosen the cake from the edge of the pan (and curse whoever thought of the silly flutes that look so pretty but make it hard to loosen anything from the pan!).  Corriher uses a thin knife.  I used my cake tester.  Flip the cake out of the pan and onto a plate, platter, or cake-saver base.  Sprinkle with powdered sugar.

I took a risk with this cake and my probably (almost certainly) not properly-temperatured oven; I've had issues baking things before.  But I wanted to try it so badly, I forged ahead.  And I'm glad I did.  It didn't turn out quite the way I expected, but it had a delicious, rich flavor.  My fiancé, who only likes about 2 types of cake, liked it, too!  It was almost cookie-like on the outside, and rich and gooey inside, almost like a brownie.  It was hard for me to eat just one piece.  


Monday, July 14, 2014

Summer Rolls et al.

Summer rolls are not to be confused with their ubiquitous counterpart, the spring roll.  I think most Americans (I can't really speak for other nations) are more familiar with the spring roll, and many people confuse them or use them interchangeably.  It's kind of like the macaroon/macaron thing (THEY ARE NOT THE SAME!-- I hope to blog about them sometime in the future).  I suppose it's a little less egregious; some people consider summer rolls to be a type of spring roll, fairly unique to Vietnam.  In Hawaii, the difference is cooking.  Spring rolls are fried; summer rolls are not, and feature fresh/minimally cooked ingredients.  I'm all about mnemonics, so I keep them straight this way: once the summer gets really hot, you don't want to fry anything.

I hadn't encountered summer rolls until I moved out to Hawaii.  I loved them instantly.  I like the thin, melt-in-your-mouth rice wrapper and fresh ingredients.  They're crisp and refreshing, and my favorites come with spicy peanut dipping sauce. Yum!  They can be made with a variety of ingredients; I adapted a recipe published in the Honolulu Star-Advertiser to make mine.

To go with the summer rolls, my fiancé and I made up a whole bunch of small bits to eat for dinner: deviled eggs (see previous blog), stuffed peppers (I've blogged a recipe before, but I'll include what we did this time), and bacon-chickenskin skewers.

Summer Rolls
1 Tbsp vinegar
1/2 tsp sugar
1/2 C julienned, matchsticked, or grated carrots
1 1/2 C chopped red cabbage (napa cabbage was called for, but red was easier to find/use leftovers of)
1/4 C matchsticked bell peppers
1/4 C matchsticked radishes
2 Tbsp scallions
8ish cooked shrimp, halved the long way
Summer Roll Rice Wrappers

Combine the vinegar and sugar with a pinch of salt, and stir until everything is dissolved.  I recommend heating it slightly, to help everything dissolve.  It'll also help wilt the cabbage a bit, because red cabbage is quite sturdy (more so than napa-- they're not really interchangeable; adapt!).  Because the next thing is to toss the vinegar mixture with the cabbage and carrots.  Once you've done that, get a large dish of hot water (I used a pie pan) and soften a wrapper by dipping it in there. Working on a damp paper towel, lay out the wrapper, and put a mound of cabbage on it. Layer on the bell peppers, radishes and scallions, too, along with 2 pieces of shrimp.  Roll by folding up the bottom, then the sides, and rolling toward the top, keeping the roll tight.  Keep damp (but not wet) until serving.  Repeat until you're out of ingredients.  Serve with dipping sauce: I had some Thai chili sauce left over from the root beer pulled pork (see previous blog), so I just used that.

Stuffed Peppers II
10ish mini bell peppers
3/4 C crumbled Queso Fresco
1/8 C bread crumbs
1/8 C chopped onions

Combine the queso fresco, bread crumbs, and onions.  Halve and clean the peppers, and fill with the cheese mixture.  Broil about 5-10 minutes until the tops are lightly browned.  If desired (or if you have extra bacon leftover from the skewers), wrap in bacon prior to broiling.

Bacon-Chickenskin Skewers
Bacon
Chickenskin, cut into strips
Ground sage

Season the chickenskin with sage, salt, and pepper.  Place a strip of bacon on top and thread/weave onto a skewer.  Pan-crisp over medium-high heat for ~5 minutes, then finish in the broiler.

Going back to the summer rolls: they're pretty versatile, in that you can put in what you want/ what you have on hand (obviously, I used red cabbage instead of napa, which is a rather significant difference).  I feel like these might be a good way to use up some leftovers, if you could appropriately season them.  (Chop up some teriyaki chicken, toss it with cold rice, cabbage, carrots…)  There's a perfect moisture level for keeping these until serving that I am still not quite sure about; too wet will make the wrapper stick to everything; too dry and it'll crack apart.  Don't stress too much about it, and be prepared to tweak your set-up. 

The peppers are super-simple, but delicious.  My fiancé loves them.  He mastered the making of them pretty quickly, which makes life easy for me!  We eat them as sides, snacks, appetizers, and occasionally even have leftovers.  They reheat nicely.

The skewers were a bit tricky for me; the broiler finish was sort of a last-ditch effort on my part to get that chicken skin crisped through, but it worked quite well. I'd still like it crispier, so I'm going to need to work with it some more, but it's a decent consistency as presented here.  It makes the skewers that much more indulgent to me; I've always loved the richness of the skin on poultry.


Sunday, July 6, 2014

Sweet Potato Fries and Stuffed Burgers

Alrighty, this won't be too original or anything,  but it was yummy nonetheless.  And really, burgers are always a great food to make, especially if you have friends coming over.  I found the recipe for the fries  on Pinterest, and couldn't wait to try them.  I also created a couple sauces to go with the fries (and/or on the burgers).

Sweet Potato Oven-Fries
1 or 2 medium sweet potatoes
Bacon, cooked
~ 4 Tbsp Garlic Confit Oil (or olive oil)
1 tsp Chili Powder
1 tsp Ground Cumin
1 tsp Ground Paprika
Salt and Pepper

Peel the potatoes and slice them into french fries. Cut or break the bacon (depending on how crisp you've got it) into pieces.  Place the fries and bacon in a bowl, drizzle over the oil, and toss to coat; sprinkle over and mix in the spices.  Dump onto a large baking sheet and spread out into a single layer. Bake in a 425˚F oven for about 20 minutes until crisp/toasty.

Cheese-stuffed Hamburgers
1.5 lbs ground sirloin
1 tsp worcestershire sauce
2 tsp onion powder
1 tsp garlic powder
1/2 tsp cumin
1/2 tsp chili powder
1 tsp pepper
1 tsp salt
Cheese of your choice (we used babble and colby jack)

Slice the cheese to about 1.5 inches by 1 inch by a quarter inch.  Combine all ingredients except the cheese in a mixing bowl and mix thoroughly.  I recommend using your hands and just squishing it all together; you're going to need your hands to form the burgers, right?  Scoop out a burger-sized portion, then divide in half.  Place a piece of cheese in the center of one half; cover with the other half and flatten into a burger.  (Tip:  Make your burger wider and flatter than you want it to be; it'll contract and thicken as it cooks, and you don't want to have to squish out the juice to make it flatter while cooking.)  Grill or cook in a pan (or on a griddle, I suppose) over medium-high heat.

Spicy ketchup
1/4 C ketchup
1/2 tsp cumin
1/4 onion powder
1/4 tsp pepper
dash crushed red pepper flakes

Combine all ingredients and allow to sit for an hour or so for flavor development.

Creamy Chive Dressing
1 Tbsp mayonaisse
1 1/2 Tbsp milk
1 Tbsp snipped fresh chives
1 clove crushed garlic confit
pinch of salt
1/2 tsp pepper
dash oregano

Combine all ingredients, cover, shake, and allow to sit in the refrigerator for an hour or so for flavor development.

I think my favorite part of this was the spicy ketchup, honestly.  It was so good, and the longer I let it sit, the better the flavor.  It was reminiscent of barbecue sauce in the end.  Tasty!   The chive sauce was a little bit like ranch.  It made a nice cooling contrast with the fries.  The burgers were yummy, too.  My fiancé cooked them, and he's great at that, so they were moist and had a nice crispness/char.  I had issues with the fries-- I did it in two batches and slightly burnt the first (larger) batch.  They were still good, but it struck me as a bit of a bummer.  I was concerned about repeating the mistake, so I erred the other way on the second batch, and they weren't so crisp.  The recipe was great.  I was just distracted and chatting with my friend, and wanted to give the fries a couple minutes more, and then someone asked, "hey what about the fries?" seven minutes later.  But it made for a great dinner, very casual, very fun.