Tuesday, April 9, 2013

Stuffed Bell Peppers... and a learning opportunity

One of the fun things about people sometimes not being around is that you get to enjoy things that they dislike.  So when the bell pepper-disliking part of my family gone and a bag of mini bell peppers from a friend sitting in my fridge, there were really only a couple options.  We went for stuffed bell peppers.

Rather than actually getting out all the recipes (we have several) and trying to figure out what ingredients we had or didn't, we turned to what ingredients were at our disposal.  A rice base seemed simple and filling.  We had rice.  Onion and leftover tarragon (from the Strawberry Marinara I posted about earlier) would be good flavors.  And cheese was a must.  I love cheese, and the idea of a cheesy bell pepper just makes my mouth water.  Since we were going to be grilling our peppers, I chose Halloumi, a firm-textured sheep's cheese that grills well.

We used:
8 mini bell peppers
1/2 C calrose rice
1/2 of a sweet onion, chopped
1 stalk fresh tarragon, chopped
1 piece of halloumi (or feta), about 1 inch by inch by 4 inches, chopped
extra 1 inch by 1 inch slices of halloumi

1)  Cook the rice, then combine it with the onion, tarragon, and chopped cheese.  Season with salt and pepper to taste.
2)  Cut the tops out of the peppers, slit them down one side, and remove any seeds.
3) Pull the edges of the peppers away from the slit and fill with the rice mixture.  Arrange the peppers on a greased cookie sheet or grill rack.

4) Roast the peppers.  I recommend doing this on a grill, because then you're outside and you don't need to worry about lingering smells.  (I once broiled some bell peppers inside, and found that no matter how fantastic they were, after 2 days it is no longer a welcome smell, and I wound up spraying air freshener with fans on and the window wide open even though it was snowing.)  I have a propane-powered grill, so it was super-easy.  Even if you don't, just get the grill going, put the peppers in place (on the cookie sheet or rack still), and cover the grill to trap in the heat.  Peek in every once in a while to see how things are going.  When the peppers are ready, you should see some browning or blistering of the skin, and/or softening and browning of the cheese.  (Firm textured cheeses don't really melt the way things like American or cheddar do.)

We had just enough for two bell pepper-lovers.  Incidentally, the rice filling makes a fantastic dish on its own-- How fantastic?  It was made again the very next evening.  To me, if it's worth cooking 2 days in a row, it must be pretty yummy.


Alas, not everything turns out as wonderfully as that.  I figured it wouldn't hurt to share something that didn't turn out well, but I didn't want to give it its own post, because that would be kinda lame.  So I'm piggy-backing this disappointment onto the triumph of the peppers.  Actually, I made this first, and the bell peppers were the next thing I tried.  (Why I keep on trying.)
I made some Lentil Soup.  Now, I have a really great Lentil Soup recipe,  but, for whatever reason, that wasn't really what I wanted.  I wanted something different.  Something with less onion and more...  something.  So I had the idea of cooking lentils with beer.  Now, beer is actually a great thing to cook with.  Ever had beer bread?  Beer cheese sauce?  Those are wonderful!  My soup wasn't.  It turned out really bitter.  I tried to balance the bitterness by adding a some sugar (not enough to make the soup sweet, because that would be equally gross) and more salt.  To an extent, it helped.  I served toast on the side, because you can use it to soak up some of the flavor (it's sort of like dillution, but with a solid).  Ultimately, though, this was not one of my successes.  I threw out the leftovers, because no one wanted to eat any more of it.  But!  I really do believe that as long as you learn from a non-success, it's not a total failure.  So, what did I learn?  1)  Some beers are better to cook with than others.  2) When working with strong-flavored ingredients, add less, taste, and then add more if you want.  I had chosen to cook with a very bitter beer (Sierra Nevada's Ruthless Rye), because I figured the strong flavor would be balanced by the lentils.  Nope.  I should have either used a different beer, or just used less.  So, although this is just a quick, piggy-backing blurb right now, hopefully I'll try again and get it right.   It just might take a while.


Sunday, April 7, 2013

Breakfast: Drop dumplings

While being vegetarian, I was unable to enjoy bacon for breakfast(imagine that), which I usually do on weekends.  How to make up for this loss?  Well, I decided to make something different instead.

About a year ago, some friends of mine found an old cookbook while cleaning up a relative's house.  How old?  1920s.  It was a small book put together by an Illinois Ladie's club, and what a fun time machine!  Some of the recipes are just crazy (as in who would eat that?), some are just oddly printed (as in ingredients that were assumed to be obvious are not listed), some sound pretty awesome.

The recipe for drop dumplings appears below:


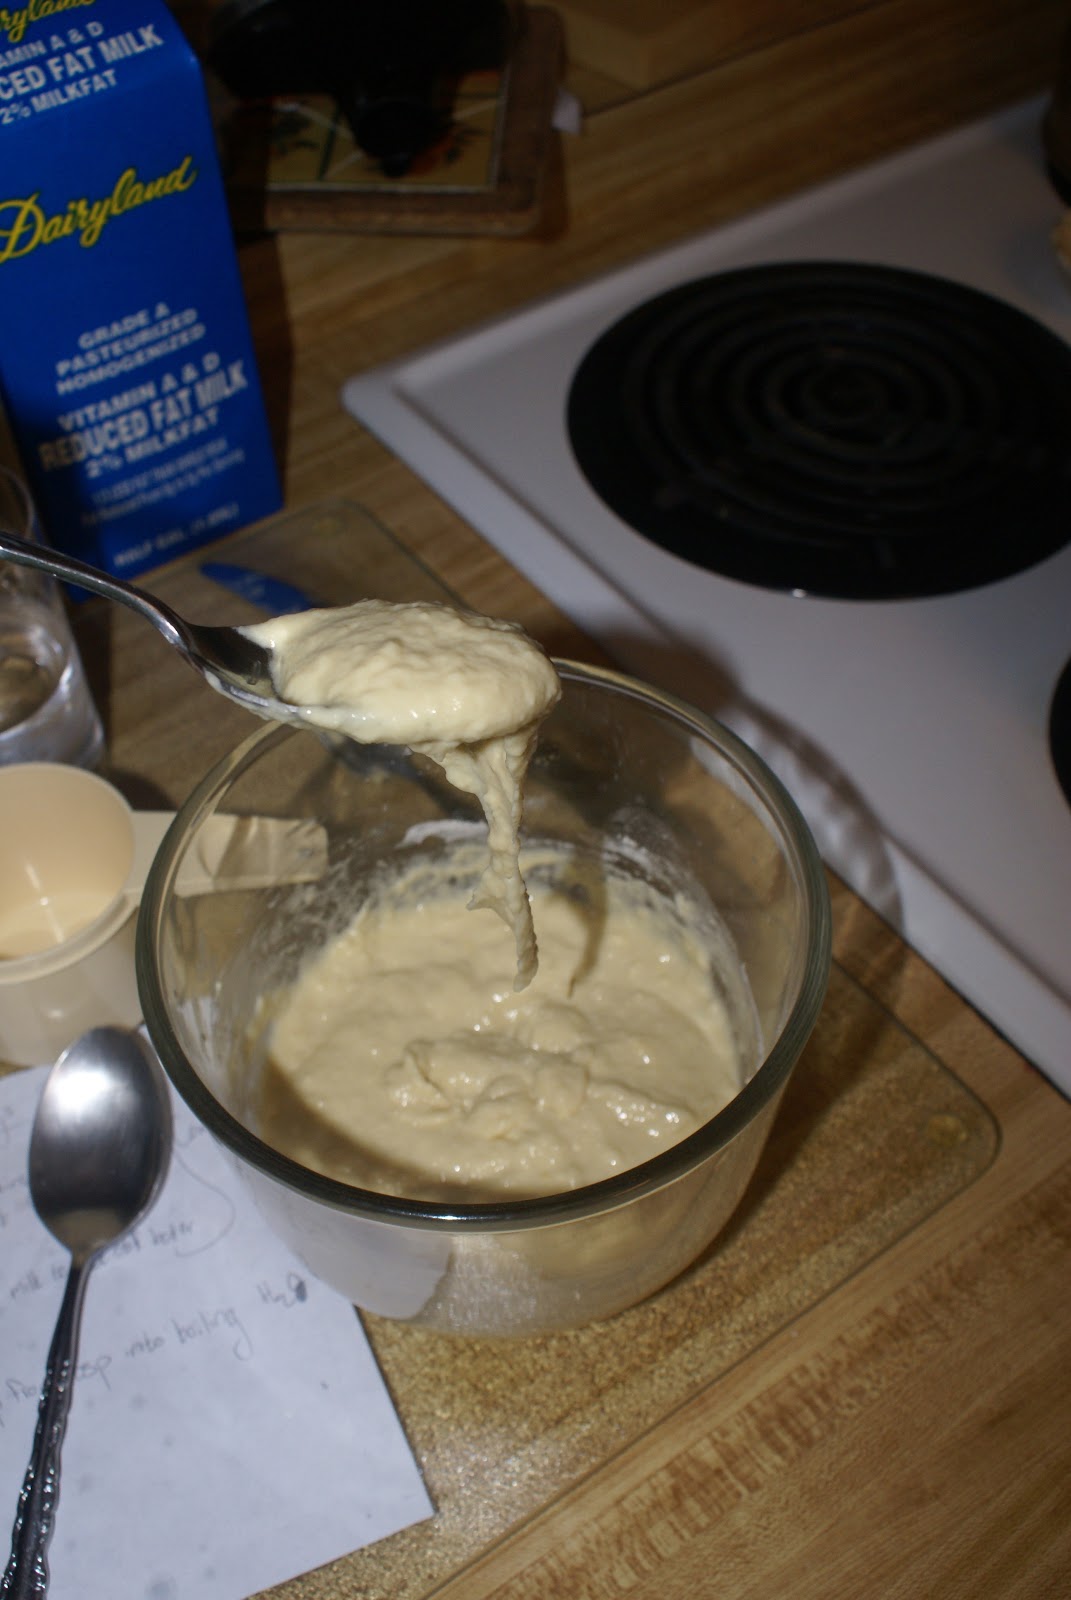
Super-simple.  And super-simplified, which can be confusing.  Basically, mix all ingredients.  My batter is pictured on the left, if you're trying to figure out what "stiff batter" means.  Basically, it's sticky and goopy, but not runny. If you scoop some of it up, it shouldn't drip off right away.

I added 1/8 C sugar to the recipe, because I like a sweet breakfast, and was sort of thinking pancake alternative.  1/8 C added just a hint of sweetness, which was just what I wanted.

I felt "drop from teaspoon" was extremely vague.  I double-checked with my mother that dumplings are usually boiled (she grew up in an area where people ate those kinds of things), just in case they were fried or something.  And then I decided that a teaspoon would result in a tiny little dumplings, which is nice, but I wanted something larger.  So I used a tablespoon (in this case, I'm talking about the larger vs. smaller spoons that come in a silverware set, not measuring spoons, in case you just grew up calling them "spoons" like I did). My dumplings came out just the size I wanted.  They also came out with uncooked centers.   (Oooooh.  I get it now.)  Lucky for me, though, I live in the 21st century and not the 1920s, so I just popped those under-done dumplings in the microwave for 30 seconds and finished cooking them that way.  It resulted in a different texture, dryer and sponge-ier  than the outer portions which had cooked completely in boiling water.  This didn't seem to bother anyone, but if I were making these for a fancy brunch or a competition, I might want to avoid that.  Oh, and a tip for getting the dumplings into the water and nicely shaped-- use 2 spoons.  Scoop from one spoon to another before finally dropping the resulting clump into the boiling water.


Serve with jam, syrup, and/or powdered sugar.  Or gravy.  I even ate some with leftover Strawberry Marinara (see previous blog).  Basically, they're pretty versatile.

Nearly two years later… 
I just had the chance to make dumplings with my mother-in-law, and I realized what I did wrong here. The trick is that dumplings technically STEAM, not boil.  You steam them in boiling water (or broth, as I did with my mother-in-law), but you don't just wait for them to float.  You have to give them 10- 15 minutes of time in the steam.  So drop them in your boiling water, then cover it up and let them steam for about 15 minutes, and you shouldn't need to use your microwave.  Also they should expand a bit, so maybe a teaspoon wouldn't be too small.  Things you learn!

Monday, April 1, 2013

Ricotta Ravioli & Strawberry Marinara

Let me start by talking a bit about Modernist Cuisine.  A couple years ago, I grabbed a copy of the New York Times, and, since it was a Wednesday, flipped right to the dining section, where my breath was taken away.  That particular day, the NYTimes was reviewing the swankiest of swanky cookbooks, a multi-volume set covering everything from the history of cooking to the science of bacterial growth in food, complete with fantastic recipes (fantastic as in possessing an element of fantasy), and mind-bogglingly amazing photographs, such as the one dominating the front page of the section: a cross-sectioned wok with veggies and noodles being tossed, all captured in the utmost clarity.  I cannot imagine how they took all these photos.  It must have been quite the labor of love.  This was my first encounter with Modernist Cuisine, and it was love at first sight.  Alas, I cannot afford $600 (yes, you read that right) cookbooks, no matter how much I pine for them.  Lucky for me, last year the wonderful people who came up with it published Modernist Cuisine at Home.  According to the introduction, they were blown away by the success of their encyclopedia of cooking (more or less), and decided to make another version for those of us who 1) don't have gigantic warehouse kitchens loaded with more gadgetry than the average research lab, and 2) really can't shell out $600.  Still REALLY espensive for a cookbook, but when I ran up against it at 50% off, I decided it was a sign and ponied up the cash.  But then I had to use it.  Otherwise, I'm just a sucker.  (I may be that yet.)  So, flipping through, what wonderful joys does this book hold?  How about a guide to kitchen appliances?  More pretty pictures (including some glossy beauties to decorate with)!  A "kitchen manual" with nothing but the recipes on stain- and water-resistant synthetic paper! A recipe for Strawberry Marinara!  Yeah, that caught my attention, too.  But they described it in a way that made me think it wouldn't be crazy to try.  So when we had guests over for dinner, I was ready!

Strawberry Marinara (from Modernist Cuisine at Home)
500g hulled strawberries
220g thinly sliced strawberries
175g peeled, seeded, and diced tomatoes
100g minced sweet onion
100g dry white wine
3g thinly sliced garlic
2g Basil leaves, torn
2g tarragon leaves, bruised
Salt 
Lime Juice
(At this point, I should say that the book also gives volume measurements, but I have a scale, so this is what I worked with)

1) Juice the hulled strawberries.  You should get about 3/4C of juice.
2) Combine strawberry juice, sliced berries, tomatoes, onion, wine, garlic, and herbs in a saucepan.  Simmer, stirring, until you have marinara consitancy.  
3) Season with salt and lime juice.

Not too hard, right? Well... I don't have a juicer.  I improvised and used a garlic press.  (The book recommends a potato ricer as a decent juicer, and strawberries are small, so a garlic press seemed like a good substitute.) Honestly, I would just skip the juicing and puree the strawberries next time.  I don't think it'd make that much of a difference.  I also would have liked to let my marinara cook longer.  I planned on it taking more than the 35 minutes it took the writers to simmer, but I didn't plan quite long enough.  I should probably have also chopped my tomatoes smaller (it does say "diced", and mine were more like "chopped"), and I would have liked more of them.  I also think next time I might add some red coloring, because the sauce was a bit pale, which was slightly odd.  Still, the sauce was pretty danged delicious. And the synthetic paper?  AWESOME.  I got strawberry juice all over, but it wiped right off, even after sitting for an hour.  I am a fan!


Ricotta Ravioli
Pasta:
3 C Flour (all-purpose)
4 Eggs

1) Heap the flour on a clean countertop, and make an indentation in the top (kinda like a mashed potato volcano-- most people have done that, right?).
2) Crack the eggs into the indentation, knead it all together into a dry, stiff dough.
3) Roll out the dough.  My family makes pasta often enough that we've invested in a pasta-rolling attachment for our Kitchenaid mixer (see photo, right).  You don't need one.  You can use a rolling pin.  Or a bottle of wine.  Roll it to the thickness you would expect from pasta.
4) Since we're making ravioli, cut the dough into strips about as wide as you want yours to be.  You'll place the filling (see below) in clumps along a strip, and moisten the dough around the clumps. Cover with a second strip.  Cut between the clumps and seal the edges.  Again, my family does this often enough that we a have a sweet little tool that does this all in one step, but that's notabsolutely necessary-- press the flat part of fork tines along the edges to seal the ravioli.

5) Throw the ravioli into rapidly boiling salted water and cook about three minutes.  Fresh pasta cooks fast.

Filling:
Ricotta
Egg
Herbs
Parmesan
Salt
Pepper

Ok, so that's a horribly vague ingredient list.  But the issue here is that it's really a matter of taste preferences and amounts.  We use a 15oz container of ricotta, 1 egg, and probably 4 Tbsps of parmesan.  I like to add the egg last, so I can taste the filling as I add things (depending on how you feel about food safety and salmonella risks, you could taste with the egg in).  For this particular night, we looked at what herbs we were using in the marinara-- garlic, basil, and tarragon-- and added those.  (About 1 tsp of garlic powder, 1/2 Tbsp of dried basil, 1 tsp dried tarragon.) On any other night, I'd probably just throw in 2 Tbsps of Italian seasoning, because you seldom go wrong with that.  Add salt and pepper to taste.  Mix this whole mass together, and you have ravioli filling.

Finished Ravioli topped with Strawberry Marinara


To sort of maintain the strawberry theme and add some veggies, I served a salad of spinach with strawberries, honey-roasted almonds, tomatoes, and a bit of cheese (doesn't it look yummy?)  To top dress it, I made a quick sweet vinaigrette.  To make a vinaigrette, one usually starts with 3 parts oil to 1 part vinegar.  I do this in a clear container, and pour in an amount that I think looks good, and estimate either 1/3 of that (if I started with oil) or 3 times as much (if I started with vinegar) by looking at the level of the liquid. If you want to, you can measure.  For this version, I used about 1/3 cup of olive oil, and estimated about 1/3 of that with Raspberry Balsamic Vinegar.  I added about 1 1/2 Tbsp of orange juice (a splash), 1 tsp of mustard,  2 finely chopped basil leaves, and and salt and pepper.  Mix it together (if you have a container with a lid, it's as easy as cap and shake), give it a taste, and adjust accordingly-- not tangy enough?  vinegar or mustard.  Not sweet enough?  Orange juice (or even a pinch of sugar)... you get it.


Wednesday, March 20, 2013

If you can't pronounce it, perhaps there is a translation...

"Sopa Seca de Arroz con Huevos."

  I  don't speak Spanish--it's kind of amusing when I try-- but I really enjoy trying.  Especially when I get to roll my "r"s or say "Huevos", which is a delightful word.   That, I do happen to know, is eggs; everything else I would have to guess at, find a friend, or use the internet.  Luckily for me, my recipe has a translation: Dry soup of rice with eggs.  That got my attention.  Dry Soup?  Well, it refers to the preparation.  How do you start a soup?  You throw everything in a pot, possibly pre-cooking it.  And that's how this is made-- you throw everything in a pan, and let it cook.  The difference between this and regular soup is that you use only as much broth as the rice can absorb, leaving you with the delicious (in a couple ways) oxymoron of dry soup.
I like this recipe for several other reasons, not the least of which was that it is fairly simple.  Look at the ingredients:  canned tomoatoes, frozen peas, carrots, onion-- nothing really out of the ordinary, except maybe the herbs, and you could probably skip those.  Simple ingredients also allow flexibility-- want to substitute?  The writer suggested using corn in place of peas.  Want to add?  How about some chilis, cheese, or even meat?  I also liked the premise under which it was published-- the Omaha World-Herald shared it with readers as an alternative to fish-sticks for meatless Fridays.  It's a vegetarian dish meant to be filling and satisfying, even to people who aren't willing to give up meat.

Ingredients:
 - 1 (14.5 oz) can diced tomatoes (I used Hunt's Fire-Roasted, for a little more flavor)
 - 1 Tbsp cooking oil
 - 3/4 C uncooked long-grain rice
 - 1/2 C chopped onion 
 - 1/3 C diced carrot
 - 2 or 3 cloves of garlic, minced
 - 1 1/2 C veggie broth 
 - 1/3 C frozen peas
 - 4 eggs 
 - 1 to 2 Tbsp chopped cilantro or parsley
 - Salt and Pepper to taste

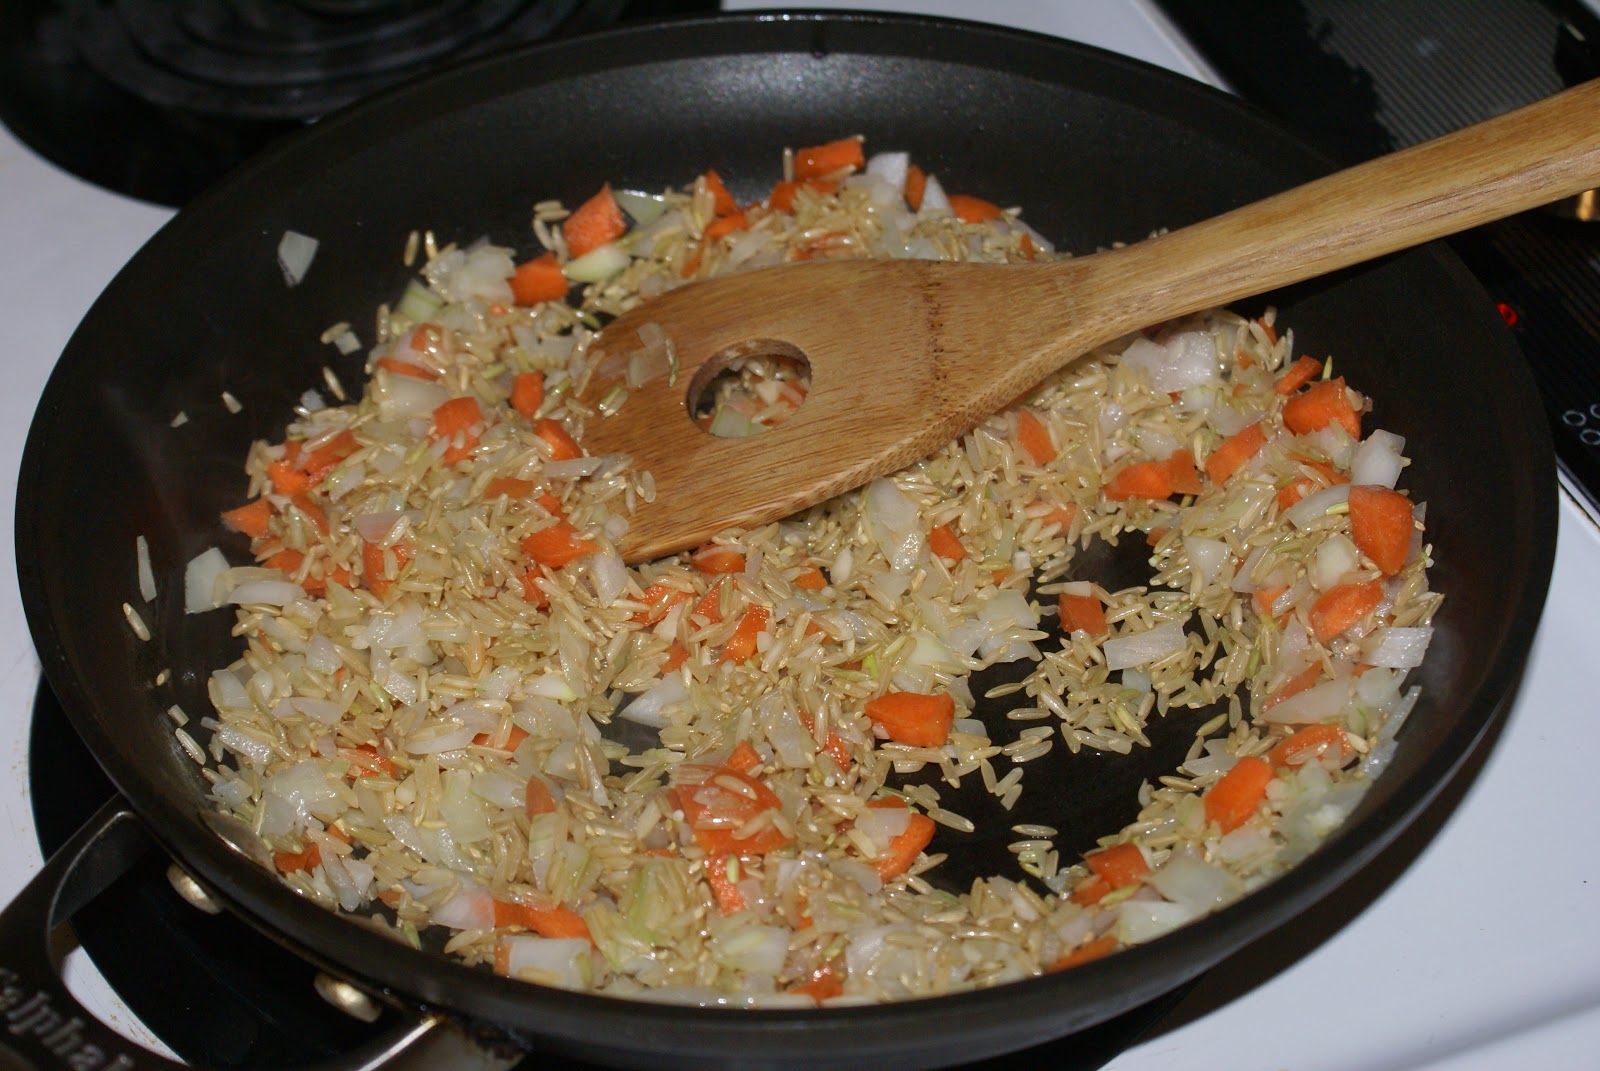
To begin, reserve about 1/2 C of the tomatoes for serving-- you'll cook with the juice and about 3/4 C of tomatoes.  Heat the oil over medium heat in a 10-inch non-stick skillet. (I don't imagine larger would be a problem, but smaller may be pushing it.)  To the oil, add the rice, onion, carrot, and garlic.   Allow to cook for about 4-6 minutes.  The onion should be softened, but the rice should not brown.  I used brown jasmine rice rather than an ordinary "long grain" rice.  This ended up increasing the time I needed to let everything simmer (next step) by about 10 minutes, but gave a fragrant/nutty flavor to the dish that I absolutely loved.

Add broth and tomatoes and juice that have not been set aside for serving.  Bring the whole thing to a boil, then reduce the heat, cover, and simmer for about 20 minutes.  At this point, the rice should be soft, although some of the liquid may still be unabsorbed.  Stir in the peas, then make 4 indentations in the rice.  (I checked the seasoning at this stage, because it seemed easier to stir before I put the eggs in.)  Crack 1 egg into each indentation.  Cover and cook until the egg whites are set, about 8-10 minutes.  I turned the heat back up, and probably would have given it less time, but I needed to make sure the yolk set, too, because I was cooking for someone who finds runny yolks extremely off-putting.


To serve, sprinkle with the parsley or cilantro.  I used parsely because I had some on hand.  Cilantro would have given slightly more flavor to the dish, but I didn't necessarily feel it was lacking in flavor.  Fun fact about the flavor of cilantro, by the way: I read a while back that research suggests how people percieve the taste of cilantro is genetic.  Some people love it; others think it tasted like dishsoap.  Usually taste is a matter of preference and conditioning (like peanut butter or vegemite), but in the case of cilantro, there seems to be a genetic link. Anyway, back to the soup-- pass the reserved tomatoes at the table.  The recipe also suggested serving with corn chips and guacamole.  I didn't have guacamole (this made me sad), and didn't feel like eating chips.  So, I cut a wheat tortilla into wedges, laid them out in my toaster oven, and broiled them for about 5-7 minutes until they were crisp and ever-so-slightly brown.  (See photo, above-left)  I placed those in the bowl prior to serving the soup, along the side.  I also put cheese and sour cream on the table, because my family loves dairy products.
One final note about this recipe: it serves four.  Perfectly, as far as I was concerned.  I fed it to three people, two of whom took seconds (smaller than a full serving), and we had just enough left over that I cooked it with an egg and called it an omelette.
My fully-dressed bowl of Sopa Seca de Arroz con Huevos.  Yum!


Thursday, March 7, 2013

Spinach Soup with Ginger

 I think I got this recipe from a book of potato-based recipes I saw while in Germany.  (It's definitely written in German).  Regardless, it's a pretty healthy Asian-inspired soup.  And it was pretty delicious.


 Ingredients:
2 Tbsp oil (recipe calls for sunflower, I used canola-- basically not olive)
1 Onion, chopped
2 cloves of garlic, finely chopped
1-inch piece of ginger, finely chopped (Photos, left, illustrate ginger chopping)
250 grams fresh spinach (about 1 package if you buy it in bags)
1 small stalk lemongrass, finely chopped
1 liter of broth (chicken or veggie)
1 small potato, peeled and chopped into small pieces
1 Tbsp Sake or Sherry
Salt and pepper
1 tsp sesame oil, to serve (optional, but recommended)

Chopping ginger can be a bit of a trick, because it has a woody texture.  My local paper recently ran a blurb about how best to chop it.  Start by peeling the ginger.  I like using a potato peeler for this; I find it takes off a thinner layer than if I use a knife.  (First photo)

Thinly slice the peeled ginger along the grain (not across the root), then slice the slices (still along the grain) into mini-French-fry pieces. (Second photo)

Up until now, I like to use a smaller knife.  At this point, I switch to my chef's knife, because I think it's easiest to chop by rocking that curved blade.  Chop across the grain, creating little minced ginger bits.  (Third photo)  I did have to pull the blade of my knife more than I normally would-- that's ginger.

In a large pot, heat the oil and sautĂ© the onion, garlic, and ginger.  After 3 to 5 minutes,  the onion should be slightly transparent.  Add the lemon grass and spinach.   The spinach may over-fill your pot, so add it gradually if you need to.  As it cooks, you'll have more space.  Stir the hot onion mixture throughout the spinach (it'll help it wilt).  Stir until the spinach is completely wilted and clumps together.

Add the broth and chopped potato, and bring the soup to a boil.  Reduce the heat, cover the pot, and allow the soup to simmer for about 10 minutes.

Here's the part that's either fairly fun, or a pain in the butt.  You need to puree the soup.  If you have an immersion blender, you're golden.  Just stick in there, turn it on, don't tilt it and spray the whole kitchen.  If you don't have an immersion blender, you need to cool the soup so you don't crack your blender or food processor when you suddenly dump hot fluid in it.  (Done this.)  How do you quickly cool your soup?  Well, maximizing surface area is a great start.  In the photo, you can see that I've put it into 2 wide, shallow pans.  Also, when you're eating soup, you blow on it; moving the air across the surface allows heat to be more efficiently transferred.  So I set up a fan to blow on my pans of soup.  It doesn't need to be especially cool; as long as you can stick you finger in it without getting scalded, you're probably in good shape.

I used a food processor, but I think a blender would have been a better choice.  First and foremost, my food processor didn't hold liquids-- unless I used short burst, the soup spurted out.  This could be because it's from the 1980s, and not a problem with modern processors.  Or it could be because food processors aren't really made for liquids.  Blenders are: they have lids that seal in their contents.    I think if I made this again, I would certainly use a blender.  I think that would solve my biggest texture problem: the lemon grass.  Lemon grass is sturdy stuff.  It didn't puree well in my processor; I think if I had left it to run for more than 1 second at a time, that wouldn't have been a problem.  As I said before, though, that would have resulted in soup all over my counter.

Return the pureed soup to the pot (if necessary) and re-heat it.  Add the sake or sherry and season to taste with salt and pepper.  I also threw in some Oyster Sauce (used in Thai cooking) because I happened to have it in the fridge and am trying to use it up.  It gave a bit more umami flavor, sort of rounding out the taste.


Serve the soup with a bit of sesame oil on top.  You don't, strictly speaking, need it, but it gives a different flavor.  Sesame oil is potent, so just a couple drops are sufficient.  You could also probably achieve a similar flavor using sesame seeds, but that wouldn't be quite as strong, and it would alter the overall texture.  The recipe also suggested garnishing with strips of spinach leaf-- just thinly slice a couple leaves, and sprinkle them on top.  I didn't do this, as you can see.  The other thing to note-- those bowls are all the soup I made.  The recipe said 4 servings; I was able to get 5 of just the right amount.  I served with toasted baguette on the side.

White Sauce

I think of white sauce as more of a technique than a recipe, and I get A LOT of milage out of it.  I discovered the roux-based sauce while reading Cooking for Geeks, by Jeff Potter (I highly recommend this book to anyone interested in food science or learning to cook-- ISBN 9780596805883).  He includes a recipe from BĂ©chamel Sauce and a couple different variations.  And that got me started.  Using this technique, you can make everything from gravy to alfredo sauce.  (One of my favorite things to do with it is beer-cheese sauce, but that'll be another day.)

 To make the Roux, melt butter in a saucepan, then add roughly the same volume of flour (usually you see 1-2 Tbsp of each-- more for more a larger recipe, obviously.)  Let the flour/butter mixture brown a bit for optimum flavor.  Be aware, though, there's a trade-off involved: Browning the flour reduces its thickening power.

After a couple minutes, start slowly adding milk or cream.  What does "slowly" mean?  Add a bit of milk/cream (or broth, even, but you want a fatty broth-- the fats interact with the flour to thicken the sauce), then stir like crazy until the texture becomes uniform. Otherwise, you wind up with lumps, and it doesn't thicken as effectively.  Not the end of the world, but not ideal.  In the photo above, the mixture is almost ready to have more milk added.  (See how there's still a bit of unincorporated milk at the edges?)

Continue gradually adding liquid until the sauce becomes liquid-y.  You can then add in bulk until you have the desired volume of sauce.  [Potter's recipe calls for only 1 cup of milk to be added to a roux made with 1 Tbsp each of butter and flour; using cream allows more liquid to be added.]  If it seems a bit thin, don't freak out.  Allow the sauce to gently simmer (stirring constantly to avoid burning) until it thickens.  This is also the time to season your sauce!  Add salt, pepper, cheese, herbs...  here's where you define and differentiate your white sauces. The sauce pictured here was flavored with Lowry's seasoning salt, fresh basil, and black pepper.  White sauce is also great when flavored with mustard (with or without cheese).

Sunday, March 3, 2013

"Aubergine" is British for "Eggplant"

Recently, I was just poking through the cheeses in the deli section of the grocery store (that's where they keep the fancy stuff, like imported Asiago or a family-owned diary's specialty chipotle cheddar, so it's more interesting than you might think), I came across Halloumi cheese.  It's a kind of Greek sheep's milk cheese; the label describes it as, "the grilling cheese of Cypress".  I got really excited, because I had seen it in one of our cookbooks, and wound up buying it.  I still haven't done anything with it, because I got distracted.  By eggplant.


Right now I'm focusing on vegetarian meals (although I'll also eat fish) because of Lent.  The problem with vegetarian food is that most of us are used to eating veggies as a salad, on the side as a not-so-exciting accompaniment, or in meat-based dishes (like my stir-fry).  So when I came across a recipe for Italian "Grilled Aubergine Parcels," I got excited.  Here was a new and different way to eat my veggies!  Basically, it's eggplant wrapped around cheese and tomatoes.  If you like those three things, keep reading.  

The recipe comes from Mediterranean: A Taste of the Sun in Over 150 Recipes, by Clark and Farrow (ISBN 9781843090151, if you're dying to know).  It's a pretty good cookbook, actually, featuring recipes from the entire region (from Turkey to France, including Morocco), so it appeals to a variety of tastes.  It's beautifully illustrated and each recipe is well-presented and easy to follow.  The only complaint I have is that it was written for a British audience.  There's nothing wrong with that, really, except you sometimes come across things that are confusing.  Like, what is gammon?  It's either hamsteak or bacon.  (Thank you, google.)

Aubergines are eggplants.  To make Aubergine parcels, you need 2 large, long eggplants, 2 tomatoes, 8 fresh basil leaves, and 8 oz. mozzarella.  Begin by thinly slicing the eggplants lengthwise into ~1/4 inch slices.  This is the tricky part.  If you have a mandolin (that's like a home version of a deli-slicer), you're golden and laughing at all of us who don't (guess which kitchen gadget I want).  If you don't, take a long, sharp knife and slice very carefully, paying attention to both ends of the blade to make sure 1) that you are cutting evenly, and 2) that you are not about to slice off your fingers (past experience).  Some people like to slice parallel to the board; this rarely works well for me.  I had the best luck standing the eggplant on its end (where I had chopped off the stem) and slicing down toward the board.  You want to wind up with 16 slices, not counting the edge slices with the skin-- that comes down to 10 slices per eggplant.  

Once you have successfully sliced your eggplant, toss the slices in salted, boiling water for a couple minutes until they are easily bent.  Let them drain on a rack, and/or blot them with paper towels.  


Remember those tomatoes?  Slice them into 8 slices.  Do that with the cheese, too, but try to make your cheese slices similar in size to the tomato slices.  To assemble your "parcels", take 2 slices of eggplant and arrange them  as a cross.  Season them with salt and pepper, and layer 1 tomato slice, 1 basil leaf, and 1 slice of mozzarella.  Season again, then fold the ends of the eggplant up around the stack to make a neat little bundle.  I had to use toothpicks to hold everything in place.


Place the parcels (there should be 8, if you haven't been following the math) in the refrigerator for about 20 minutes.  When they are cool, brush them with Olive oil and grill them over direct heat for about 5 minutes a side.


A brief note about my family's preferred grill set-up.  We have a  propane-fired grill.  This allows us a little more temperature control.  The draw-back is that we don't get those wonderful flavors that come from charcoal.  To compensate, we almost always cook with wood chips on the rack next to the food.  The flame from our burners scorches the wood and causes it to smoke.  We close the top of the grill, and the smoke flavors are absorbed by the food.  For a recipe like this, the smoke-flavor isn't a big deal. For a steak or something that cooks longer, you notice it more.  A note of caution:  don't run out and grab the first wood chips you find.  You want to make sure they haven't been treated with chemicals that you really don't want to eat.  Look for wood chips in the grilling section of the store (we have applewood and hickory chips marketed by CharBroil) to make sure you're getting edible ones.


To top the aubergine parcels, combine 4 Tbsp olive oil, 1 tsp balsamic vinegar, 1 Tbsp tomato paste, and 1 Tbsp lemon juice to make a dressing.  Vinaigrettes are that easy to make-- basically 4 parts oil for 1 part sour stuff.  You can get creative from there.  I used tomato paste that had some pesto seasoning (basil) in it to give the dressing a bit more pop.  Taste, adjust, and add salt or pepper if you think it is needed.


To go with the parcels, I had bought some bread.  When I wound up with a bunch of extra tomato and eggplant, I decided to make a Bruschetta.  Traditionally, bruschetta is grilled bread rubbed with garlic and topped with oil, vinegar, salt and pepper (doesn't that sound like a salad dressing?).  Most people (at least in the US) think of it as having tomatoes on top.  My variation had no garlic.  I just chopped up the leftover tomato and eggplant, spread it over the bread, added salt and pepper, and drizzled over olive oil and balsamic vinegar.  I stuck it under the broiler until the edges of the bread were browned.

I served both the parcels and the bruschetta topped with the vinaigrette and pine nuts.