Saturday, June 28, 2014

If a crepe and a quiche had a baby...

My wonderful aunt got me an absolutely fabulous Christmas present this year-- a couple magazine subscriptions, including Simple & Delicious.  NAILED IT!  The recipes are all simple, quick, and no doubt delicious.  When I was flipping through and found a recipe for a puff pancake, I decided that I needed a fancy breakfast for myself.  I had some old candy bars and a ton of super-ripe melon that I wanted to use up, so I opted to use them instead of berries as the recipe instructed.
I was also interested to see how it would turn out.  It was different from any other pancake recipe I've seen.  You make it in a pie pan and bake it, for one.  Also, it has 3 times the sugar and 1/3 the flour of the pancake recipe I normally use.  From reading BakeWise, by Shirley O. Corriher (more on this book in a later blog), I recognized a couple things: the first was steam leavening.  There isn't anything in this recipe that will cause the "puff" other than steam (no baking powder, etc.).  Also, the amount of sugar probably affects the texture.  I can't be sure on that without tweaking the recipe, but I'm reluctant to try that.

Puff Pancakes
1 Tbsp butter
3 eggs
1/2 C milk
1/3 C flour
1/4 tsp salt
3 Tbsp sugar
3 chopped Yogurette bars (or some other chocolate/yogurt candy)
1 C chopped honeyrock/ cantaloupe


Preheat your oven to 400˚F.  Place the butter in a pie plate and put in the oven to heat up.  Whisk together the eggs, milk, flour, salt, and sugar.  Briefly (so it doesn't cool too much) pull out the pie plate, and tilt/swirl so the butter coats the entire surface.  Pour in the batter, and replace in the oven for 10-12 minutes to bake.  While it's baking, sprinkle the melon with a bit of powdered sugar.  The sides should puff up and become slightly brown.  Immediately put the chocolate on the pancake so that it will melt.  Top with the melon, and serve hot and fresh.

Yummy!  The texture, as I suggested in the title, is a lot like a cross between and crepe and a quiche.  This made me think that it would also be delightful with savory components.  I tried this, actually, using cheese, bacon, and bell peppers, and it was so yummy.  My fiancé thought so, too.  Sadly, I have no photo for this.  But the point I'm trying to make is that it is deliciously versatile; you can put any number of toppings on this.
It really does need to be served right away, not just kept warm.  I wanted my chocolate to melt, so I took out the pancake, and put it back almost right away.  It still deflated.  That said, the puff-look is the only thing affected.  It actually keeps well in the fridge, so if you have any left over (you know, if you don't eat the whole thing yourself, or share it with people), you can enjoy it the next day.


Sunday, June 22, 2014

Need a Vegan Dip?

While I had the Greek cookbook, I decided I ought to look at how Mr. Psilakis made tsatsiki.  I cannot get enough of that.  I didn't actually make it, though, because I didn't have a need for it, and I didn't have time to go to Whole Foods to get the kind of yogurt that I like.  But on the opposite page was a recipe for eggplant spread.  It used the garlic confit, and one of the serving/use suggestions included the chickpea confit.  Well, why not?  Bonus: eggplant.  I like to try new things with eggplant, because I've had some great eggplant, but personally find it tricky.  I want to get it right!  I want to get somewhere where I can say, "oh, look at that beautiful eggplant!  I know just what to do with it!"  This recipe is a great step in that direction.

Eggplant Spread
1 large Eggplant
1 Tbsp Olive Oil
6 Shallots
2 cloves Garlic
1 mini red bell pepper
1 mini yellow bell pepper
1 Tbsp lemon juice
12 cloves Garlic Confit 
1/4 C red wine vinegar
1/4 C olive oil

Preheat the oven to 350˚F, wrap the eggplant in foil and roast it in the oven until very soft.  For me, it took about an hour and a half.  Let it cool enough that you can touch it without blistering your fingertips off, then peel the eggplant.  I cut it into large pieces.  Line a colander with, if you have it, a double thickness of cheesecloth. I didn't, so I used a whole bunch of paper napkins instead.  Place the eggplant into the lined colander to drain overnight.

When ready to resume cooking, dice the shallots, smash and mince the garlic cloves, use a toaster oven to roast the bell peppers, and cut the red one into strips and the yellow one into smaller pieces (it makes things a little more visually interesting).  Warm the olive oil over medium-high heat, and cook the shallots until tender.  Add the garlic and bell peppers and cook about a minute more.  Remove from heat and deglaze the pan with the lemon juice.

In a food processor or blender, combine half the eggplant and the garlic confit.  Purée until smooth, then add the red wine vinegar.  Slowly drizzle in the olive oil while blending constantly (you're making an emulsion here).

Chop the remaining eggplant, and combine with the shallot mixture and eggplant purée in a good-sized bowl.  Season liberally with salt and pepper.

This dip has an amazingly creamy mouthfeel and taste.  I was surprised; I double-checked the recipe to make sure that I hadn't forgotten adding a dairy component at some point.  It was delicious.  I ate it for breakfast, lunch, and dinner, usually spread on top of some beer bread, although I also used it as a dip for veggies and chips.  It probably would have been a nice addition to sandwiches, although I never got that far.  The biggest criticism I had of it was that it is not very pretty.  It is (as you can see) this odd brownish color.  I know that's just the color of eggplant, but it makes it harder to get people to try something new.

The serving suggestion I took advantage of involved combining 1 C eggplant spread and 1 C chickpea confit (drained).  Chop them together on an easily-wiped-down cutting board, then transfer them into a bowl.  Add an egg and about 1/3 C breadcrumbs (enough to make it a texture that can be formed into a ball).  Form into small fritters, dredge in flour, and deep-fry until crisp. 

The fritters were also fantastic.  Like all fried things, they were best hot, although they were so flavorful I enjoyed them cold, too.  Both of these recipes are my new favorite way to eat eggplant.


Monday, June 9, 2014

Chickpea Confit

My last blog was about garlic confit, a recipe I found in How to Roast a Lamb.  While I was doing the whole confit thing, I went ahead and made chickpea confit, too.  There was a bit of irony to this recipe, because I used canned chickpeas, which are already shelf-stable, and made what is essentially a preserve out of them.  But it's another kind of deliciousness, so let's not get hung up on that.


Chickpea Confit (By Michael Psilakis)
1 head Garlic
1 tsp cumin
1 tsp mustard seeds
28 oz. canned chickpeas (aka garbanzo beans)
Kosher salt
Pepper
Canola Oil
Olive Oil

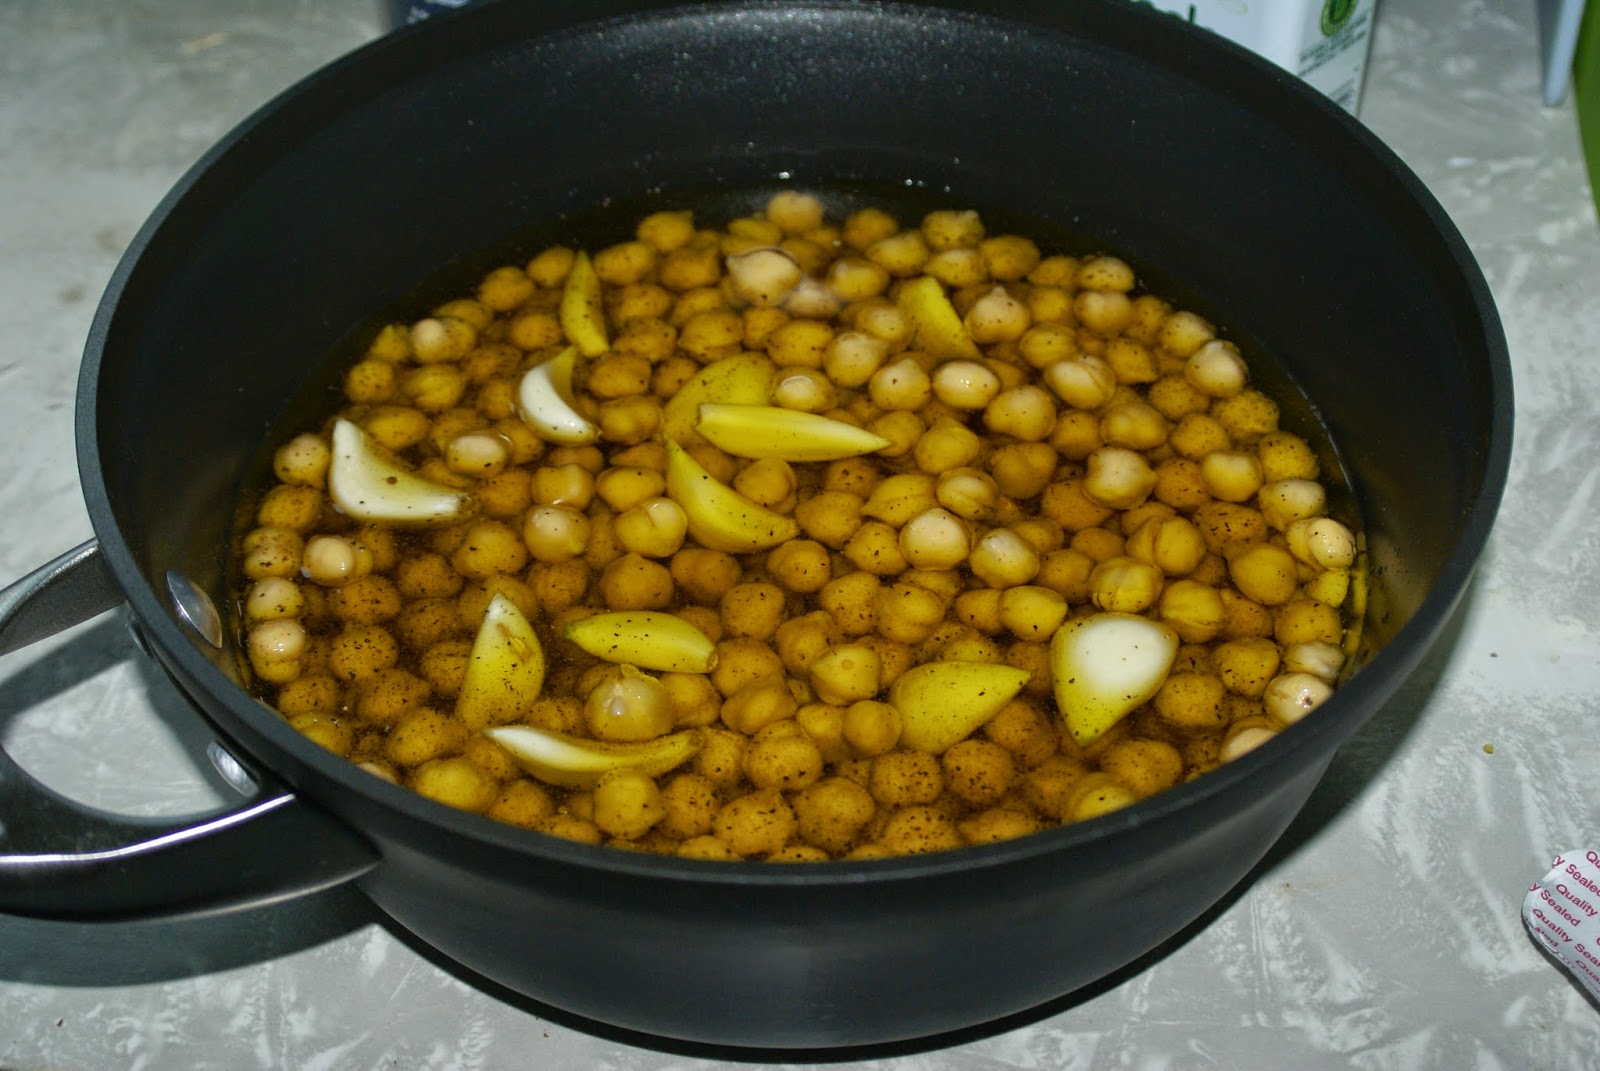
Separate and peel the garlic cloves, and rinse and thoroughly drain the chickpeas.  Preheat the oven to 325˚F.  Combine the garlic, cumin, mustard seeds, and chickpeas in a heavy, oven-safe pot.  Season with salt and pepper, and pour in equal amounts of olive and canola oils until everything is just barely covered.  Place the lid on the pot and cook about 45 minutes, until "aromatic but not browned."

Sterilize a jar.  After the chickpeas are finished, let them cool and transfer them and their oil into the jar. Store in the refrigerator, and enjoy the delicious chickpeas and cumin-flavored oil.

When I decided to make this, I wondered what I would do with a bunch of chickpeas.  I had a vague idea that I could make some amazingly awesome hummus.  I still haven't done so (I've gotten hung up on tahini), but I've made excellent salads.  The oil is great for a vinaigrette, and the chickpeas themselves are a nice topping to a salad.  Make your salad even fancier by adding home-made croutons toasted in the oil.  The chickpeas are also ideal for fritters or burgers, bringing rich flavor that they don't necessarily have.

Probably my favorite thing that I did with these, though, was a fresh tomato salad.  I cut up some tomatoes and some fresh, mild-flavored cheese (I used Babybel, because I had some, but mozzarella or queso fresco would be equally nice).  I tossed them together with some of the chickpea confit, a bit of balsamic vinegar, a tiny drizzle of oil from the garlic confit (just to give it a little more garlic flavor), and some thyme.  It was delicious, healthy, and a great side dish or snack.


Sunday, June 1, 2014

Thank you, Michael Psilakis. I love the garlic.

I recently got lost-ish in the library, found myself toddling down the cookbook aisle, and wound up checking out How to Roast a Lamb: New Greek Classic Cooking (ISBN: 9780316041218).  I love this book.  I want to cook just about everything.  I'll probably buy it sooner or later.  But in the meantime, I chose two recipes that sounded too good to pass up: Garlic Confit and Chickpea Confit.  This blog will for the garlic confit; chickpeas will get their own.

The writer, Michael Psilakis,  said in the intro for the garlic confit recipe that the reader would thank him for that recipe, "if nothing else in this book."  He was right!  So as I said in the title, thanks, Mr. Psilakis.

Confit is a traditional preservation method in which the item you are preserving is slow-cooked in oil.  It works because the oil keeps out water and makes it difficult for bacteria to grow.  So the trick here is that you want everything to be as dry as possible, and you want to have a bit of extra oil.  Because we live in the 21st century, refrigeration adds even more shelf-life to confit, so the recipe uses a blend of olive oil and canola oil.  Olive oil for flavor; canola to keep it clear and fluid in the cold.

Garlic Confit
3 C garlic cloves, peeled
2 dried bay leaves
10 sprigs fresh thyme
1 Tbsp Kosher salt (skimpy Tbsp)
1/2 Tbsp Pepper
1 C olive oil
1 C canola oil

Preheat your oven to 350˚F.  Put the garlic cloves in a heavy, oven-safe pan.  Add the bay leaves, thyme, salt, and pepper.  Cover the whole lot with oil, cover, and pop in the oven for an hour and 15 minutes, until it is tender and golden.  Pull it out and cool it to room temperature (approximately).

While the confit is cooling, sterilize a jar.  To do this, place it in a pot of water so that the water is able to flow in and out of it, and bring it to a boil.  After a couple minutes of boiling, carefully remove the jar from the water (and pour out the water), and place it upside-down on clean, dry paper towels.  Allow to dry completely, and DO NOT touch the inside.

When the confit is cooled, transfer it into the jar.  I had to use a spoon (which I sterilized the same way I sterilized the jar).  Cover the surface with a piece of plastic wrap (don't touch the oil!), and place the lid on the jar.  You don't need the confit to be perfectly room temperature, just cool enough to not shatter the jar.  The less time you spend cooling it, the less time conditions are good for bacterial growth.  Once you've to it in the jar, you can let it continue to cool.  You can place it in a cold-water bath to cool quickly.  Then put it in the fridge.  According to Mr. Psilakis, they should last at least 3 weeks in the fridge, as long as you aren't sticking your fingers in or anything.

The hardest part of this is that is time-consuming.  I spent close to 2 hours peeling garlic.  I set up a little peeling station, with a bowl for peel, a bowl for peeled cloves, and a bowl of whole heads of garlic, put on a show I liked, and did my best to enjoy it. 

The best part of cooking this (besides eating; I'll get to that) was that my whole house smelled like garlic.  In a really pleasant, Italian-restaurant-y kind of way.  It isn't like raw garlic.  

The flavor is amazing!  I love it.  This is garlic at its finest.  I was able to eat a whole clove of it.  It was almost sweet, without being caramelized.  It didn't sting or even give me bad breath.  And the oil!  Oh, I LOVE the oil.  I've been cooking just about everything with this oil-- popcorn, meat, veggies.  I drizzled it over a tomato.  BEST DANG TOMATO I have ever eaten!  Worth all the time an effort I put into it.  Hands down.


Tuesday, May 20, 2014

World cuisine-inspired Deviled Eggs

If you use Pinterest, you probably noticed that around Easter, everyone and their husband's uncle's mother-in-law's best friend's cow pins deviled egg recipes, because if you have kids, there's a good chance you're dyeing eggs.  And if you're dyeing eggs, there's an even better chance you hard-boiled them.  And then you're stuck trying to eat a dozen or so hard-boiled eggs in a relatively short time period.  Deviled eggs are a great way to do this.  Deviled eggs are also a neat opportunity to explore savory flavors.

World cuisine is a great source of flavor inspiration.  While no one dish or combination of flavors can capture the complexity and diversity of national and/or regional cuisines, one can see certain flavors predominate, or certain dishes are near and dear to people's hearts.  I've used that approach to create these deviled egg recipes-- one is inspired by flavors I associate with Mexican foods; the other is inspired by Greek flavors.

A friend of mine told me recently that she really enjoyed these recipes; apparently she does't usually like deviled eggs and just tried them to be polite.  For her benefit (and that of others, probably), I'm going to try to include measurements.  Please note that the measurements listed in the following recipes are estimates, and should be adjusted to taste.  If in doubt, put in less to start with.


Mexican-inspired Deviled Eggs
4 hard-boiled eggs
2-3 Tbsp mayonaise
1 tsp yellow mustard
1/4 tsp chili powder
1/2 tsp ground cumin
pinch onion powder (a big pinch)
1 Tbsp chopped fresh cilantro leaves, plus some for garnish
salt and pepper


Cut the eggs in half and pop the yolks out.  Place the yolks in a small bowl and add the mayo, mustard, chili powder, cumin, and onion powder.  Using a fork, mash everything together until it is [more or less] smooth.  Stir in the cilantro leaves, and season to taste with salt and pepper.  If you're feeling fancy, pipe the yolk mixture back into the egg white halves.  If you just want to get them done, don't want to deal with cleaning a piping bag, don't have a piping bag (and don't want to use the plastic baggie with a snipped corner method), or can't bear the thought of losing even a little bit of the delicious yolk mixture to a bag, just spoon the mixture into the egg white halves.  They'll taste good enough that people shouldn't mind too much.  Garnish, if desired, with a sprig of fresh cilantro.

Greek-inspired Deviled Eggs
4 hard-boiled eggs
2-3 Tbsp mayonaise
1 tsp yellow mustard (a skimpy tsp)
1/4 tsp lemon juice
dash dried lemon zest
1/2 tsp dried oregano
pinch garlic powder
salt and pepper

As above, halve the eggs and scoop out the yolks.  Mash together the yolks, mayo, mustard, lemon juice and zest, oregano, and garlic powder.  Season to taste with salt and pepper, and place into the halved egg whites.


Something I've learned the hard way: egg whites are slippery buggers.  Watch out!  My recommendation is not to serve them on a regular plate.  Use a dish with sides, like a pie pan or a storage container, or one of those fancy egg-plates that have indentations just for deviled eggs.  

Also, if you can let these recipes sit for a little bit, you'll have better flavors, because the ingredients will have more time to blend their flavors together.  I recommend doing this before filling the eggs, because a small bowl is pretty easy to cover tightly.  The filling will dry out if you aren't careful, and it can look a little funky when that happens.  

Finally, I am always on the look-out for tips for "perfect" eggs.  I have not yet worked out the magic formula.  What I have worked out is the easiest way to cook them: put the eggs in a pot filled with cool water, and bring it to a boil.  Once it comes to a rolling boil, turn off the heat, cover the pot, and let the eggs cook with carry-over heat until the water has cooled.  I like this method because it saves me wondering how long is long enough for cooking them.  It also uses energy efficiently; you only need to heat the water to a boil.  I usually boil the eggs right before I need to run and errand or something, so all that carry-over cooking/cooling happens while I'm busy with other things.  It makes it seem like I'm not waiting.


Friday, May 9, 2014

Mini-quiches… or a souffle?

I've thought for a while that I would like to, someday, make a soufflé.  But I've been put off by fear from listening to stories of collapsed soufflé frustrations.  Except I think I almost made some on my own.  It went like this:  I had some not-so-fresh-anymore fresh spinach that I needed to use up, and I decided quiche sounded good.  Except there wasn't much of the spinach; I had been eating it pretty faithfully.  So I decided on mini-quiches.  And then I got curious about what, exactly, defines a quiche.  According to one source, it's basically a savory custard.  Yum!  That's an even more delicious prospect than my description, "egg pie" (see previous "Quiche" blog).  So with that in mind, I got fancy.  I separated my eggs, beat the whites, and used what I think of as a typical custard approach, like for cream pie.  Everything turned out nice and quiche-y.  But they puffed up in the oven!  How cool!  And the deflated as the cooled… and I realized I'd heard that story before.  Sure enough, when I checked what exactly a soufflé is, I had more or less stumbled upon it with this recipe.  So now I'm not so intimidated.  

Mini souffle-quiches (makes 6)
Pie dough of choice
1/8 C cooked spinach (see notes)
1 1/2 slices lunch-ham, diced
1 egg, separated
~1/4 C milk
1/8 C shredded Italian blend or mozzarella cheese, plus some to top
salt and pepper, to taste

Prebake your pie-crust:  Preheat the oven to 375˚F.  Take a piece of dough about the size of a ping-pong ball and press it into a muffin tin, making sure to evenly distribute along the bottom and up the sides of the cup.  Line with foil to prevent over-browning and weird puffing-up.  You don't need to poke these with a fork, but you can if it makes you feel better.  I've seen recipes that say to do this; I've seen others that say DON'T, like the whole thing will blow up in your face if you do.  I poked some of mine and not others, and by the time they were finished, I couldn't  tell which were which.  Bake ~10 minutes until the crust seems slightly set.  Remove the foil, and bake an additional 10 minutes until golden. Remove from the oven (and turn the thing either off or down) and allow the crusts to cool.  

When the crusts are cooled, preheat the oven to 360˚F (I know this is weird, I was guessing at a good temperature, and this is what my oven and I settled on).  Combine the spinach and diced ham in a small bowl, season with pepper, and set aside.  Whip the egg white to frothiness in another small bowl, and set aside.  Combine the egg yolk and milk in a small saucepan, season with salt and pepper, and heat over medium-high heat, whisking all the while.  When it begins to thicken, begin adding it, 1 spoonful at a time, to the egg whites, whisking/beating them thoroughly with each addition to maintain texture.  After you've added a couple spoonfuls, you can add larger amounts of the yolk mixture.  Stir in the spinach and ham mixture and the cheese.  Spoon into the crusts and bake for 10 minutes.  Sprinkle a little more cheese on top of each mini-quiche, and bake 10 minutes more.  

I love that this was accidentally a soufflé.  It really makes me feel better about making them in the future.  I would recommend trying it as a first soufflé yourself, because if it does collapse, you still have delicious quiche worth eating.  I know, because mine collapsed over time (as they cooled) and kept quite well in the fridge until I re-warmed them.  So go ahead and give them a try: you may surprise yourself!


Monday, May 5, 2014

"Divine" may be a bit of a stretch

A few years ago, my family and I were members of St. Timothy's Aiea.  During this time, the congregation compiled a cookbook as a fundraiser.  I guess, from the number of friend I have with similar books, that this is a fairly normal thing.  I got really excited.  It was a fairly diverse congregation, so the odds of finding new and exciting recipes was pretty good.  And everyone puts their best foot forward for such a thing-- either something cheap, quick and never-fail, a crowd-pleaser, or the most amazing thing they ever learned to make.  It's a pretty cool thing.


Recently, I found myself wondering what I ought to do with the chicken pieces I had in my freezer (I'd bought and broken down a whole bird while making soup, but had hardly used any meat.)  I starting flipping through the church cookbook, and decided on "Chicken Divine".  Not only is the name pretty promising, but I had most of the ingredients handy.  It's an interesting, rather Hawaiian casserole.  I mean, I cannot think of anywhere else people would combine cheese and curried mayonnaise.  But in Hawaii, sure.  Why not have some Spam with that?  But that's another blog…

Below is the recipe as I found it in the book; check my notes (in italics) for clarification and/or modification.

Chicken Divine
2 10-oz. boxes frozen broccoli, chopped
2 C boneless chicken, cut into bite-sized pieces (or ham, if preferred)
1 10-oz. can cream of mushroom soup (or cream of chicken, if preferred)
1 C mayonnaise
1 tsp lemon juice
1/2 tsp curry powder
1/2 C grated cheddar cheese
1/2 C bread crumbs

Preheat the oven to 350˚F.  Pour boiling water over the broccoli and drain well, arrange in a buttered 9x13-inch pan.  Distribute the chicken over the broccoli.
In a mixing bowl, combine the soup, mayo, lemon juice, and curry powder.  Pour/spread the mixture over the chicken and broccoli.  Top with cheese and bread crumbs, then bake 30 minutes.

Notes: 
- I used less broccoli than called for-- I got a 1 lb bag and figured that was close enough.  Consequently, I also used a smaller pan-- closer to 7x11 than 9x13.
- Pre-cook the chicken.  I went back and forth on whether or not to do this.  I ended up partially cooking the chicken, and still felt it was just slightly under-done.  I dealt with this by microwaving the food, which was a little silly when it was piping hot out of the oven, but convenient when re-heating.
- Use more curry powder.  And possibly some pepper.  I also am a cheese fan, so I used closer to a whole cup.  And probably more bread crumbs, too.


This dish could probably have been named better.  For one, the broccoli seemed to be more present than the chicken.  And while it was a delicious dish, "divine", to me, has connotations of lightness.  (Think angel food cake.)  The mayo, while giving the casserole a semi-whipped texture, is rather heavy.  So much so that, although it was tasty, I wasn't thrilled at the idea of eating tons of leftovers.  The mayo just sort of sits in my stomach.  It's probably a psychological thing-- for the longest time I would not eat mayo, so knowing how much is in this probably put me off a tad.  

That said, I really did like the flavors of this dish.  It was rich, it was flavorful without being spicy, zesty, or over-whelming.  I would recommend it for potlucks or feeding relatives while they're visiting-- any time you don't expect lots of leftovers.  And should you have some anyway, it does reheat well.