Monday, October 14, 2013

Honey-Bourbon Glaze

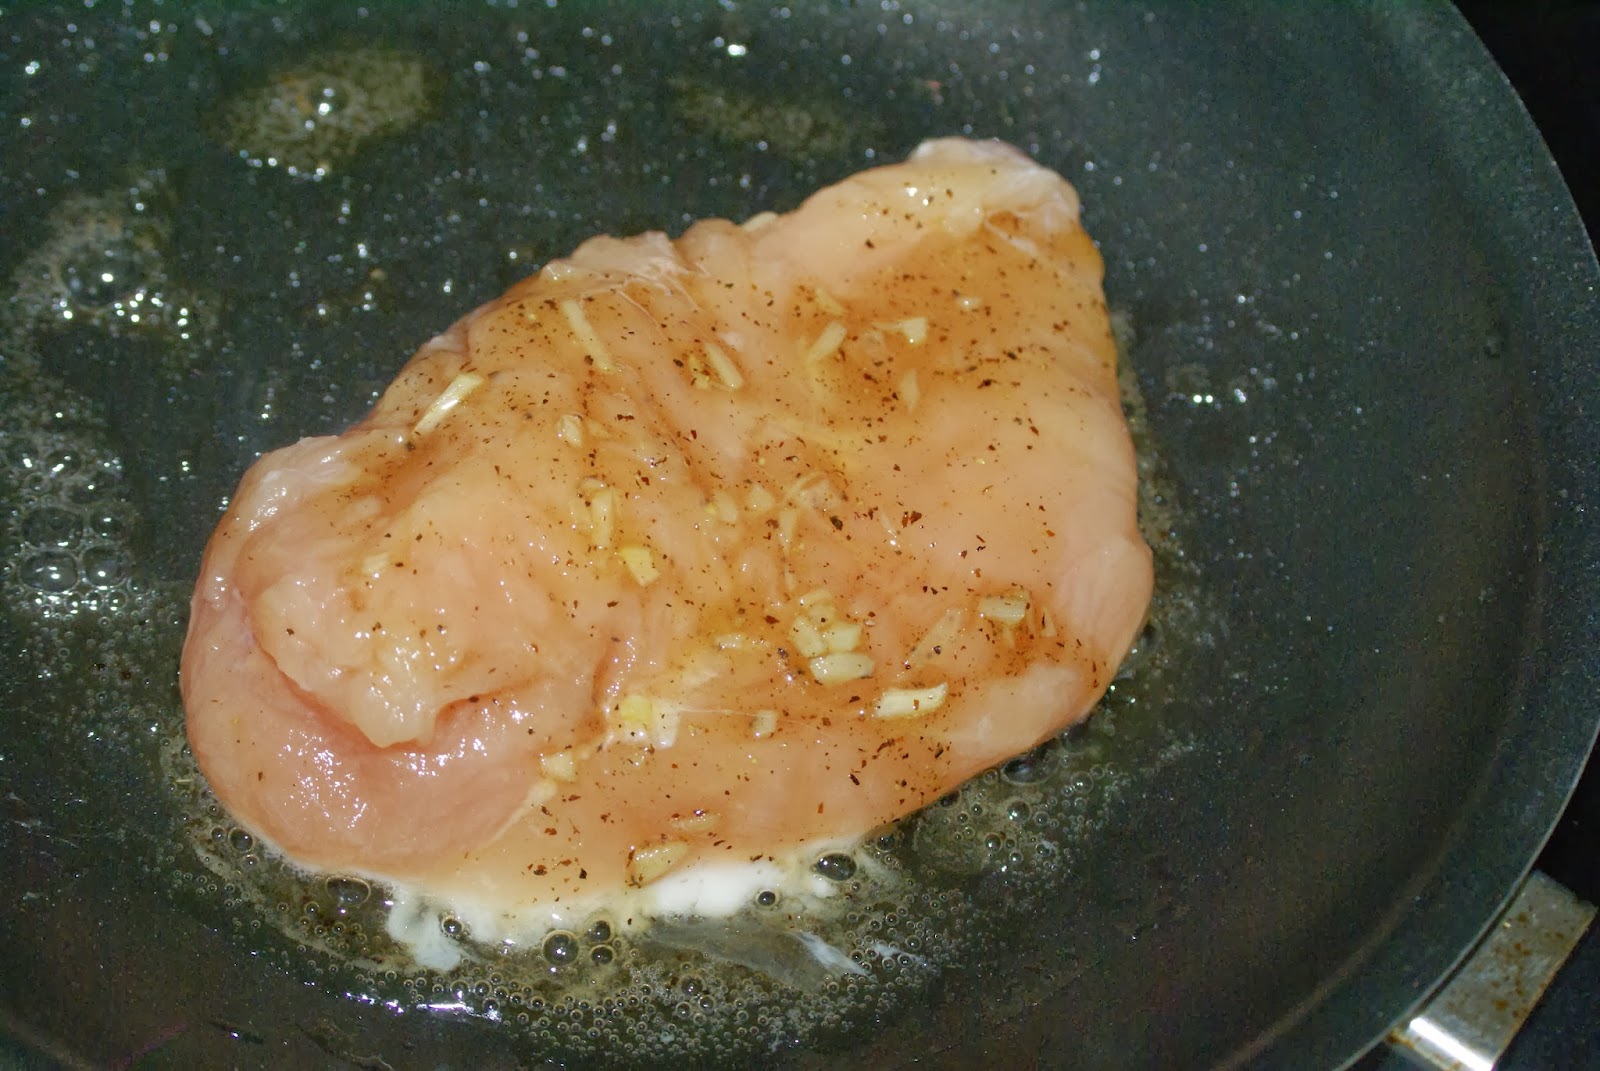
So, now that I bought a bottle of bourbon to make a batch of cupcakes, I'm using it for other things.  Because it is delicious.  One of the first things I tried was a glaze.  Simple, uses about 5 ingredients, took about 2 minutes to make, plus cook time for the chicken: a good weeknight meal with lots of flavor.  The recipe that follows makes enough glaze for 1 generously flavored chicken breast.

Honey-Bourbon Glazed Chicken Breast
1 Tbsp Honey
1 1/2 Tbsp Bourbon
1 clove garlic, minced
salt and pepper, to taste
1 chicken breast
1 Tbsp oil for cooking

Combine the honey, bourbon, garlic, salt, and pepper in a small bowl.  It should form a liquid with a viscosity similar to oil; fluid, but a little thicker than water.  Spoon a little of the glaze over the chicken breast.  Heat the oil in a pan over medium-high heat, and place the chicken, glaze-side down, in the pan.  Spoon most of the remaining glaze on the upper side of the chicken (it will flow down into the pan and thicken as the chicken cooks).  After the bottom half of the chicken is cooked, flip the chicken over, and pour the remaining glaze onto the cooked side of the chicken.  Be sure to periodically stir the chicken and glaze around the pan to prevent burning of the glaze.  Cook until the chicken is done, plate it, and pour the thickened glaze over.

As you can see in the photo below, I served this simply with potatoes.  I sliced them thin and cooked them in oil in the same pan I had just used for the chicken (without rinsing-- if there was any more glaze in there, the potatoes were going to get it), and seasoned them with salt and pepper.  The simplicity of the potatoes (and fresh veggies on the side) allowed the glazed chicken to really stand out.

As for the chicken: WONDERFUL flavor.  I was really pleased with how this turned out.  I used a little bit more pepper than I probably meant to, but that actually gave it a nice kick.  It had a sweet and savory balance, and I found myself wanting to wipe every last bit off my plate.  I would like to try marinading with the bourbon next time; it gives an additional tenderness that you don't get with a glaze.


Tuesday, October 8, 2013

Beginning of Bourbon Blogs (CUPCAKES!)


      For my 21st birthday, I was given Booze Cakes, by Krystina Castella and Terry Lee Stone (ISBN: 9781594744235). It features a fantastic selection of cakes baked with alcohols, ranging from traditionally spiked cakes (Lane Cake), to traditional cakes spiked for kicks, to traditional cocktails reinvented as cakes. I decided to make myself Mint Julep Cupcakes for my birthday this year; I happen to think mint julep is a fantastic drink. Bourbon has a sweet, almost syrupy quality that is balanced by the addition of ice and/or water. The mint makes it even more refreshing and summery. I adapted Castella and Stone's recipe a little bit to better suit my needs. My version follows:

Mint Julep Cupcakes
1/2 C butter or margarine
1 C sugar
4 eggs
4 oz. bittersweet chocolate
1 C flour
1 tsp vanilla extract
3 tsp mint extract*
1 Tbsp bourbon


     Begin by melting the chocolate, preheating the oven to 350˚ F, and prepping the baking pan. Put the in a microwave-safe bowl and microwave it on about 50%power for 30 second intervals, stirring thoroughly between intervals until all chocolate is melted. Grease and flour a 12-cup cupcake pan.
     Cream together the butter/margarine and sugar until light and fluffy (see my 1st blog for a picture of what that should look like). Beat in the eggs one at a time. Add the chocolate, flour, and extracts. Once those are well-combined, stir in the bourbon. Spoon the batter into the cupcake tins and bake about 15 minutes, or until a toothpick inserted into the center of the cupcakes comes out clean. Let it cool completely.


Whipped Bourbon-Cream Frosting
1 1/2 packages of cream cheese (12 oz. total)
1/2 C confectioner's (powdered) sugar
1 C heavy cream
1 tsp mint extract
1 Tbsp bourbon


     Combine the cream cheese, sugar, and cream, and stir together until the sugar is mostly moist. Switch to egg beaters and mix everything to a uniform, fluffy consistency. Add in the mint extract and bourbon, and adjust to taste.

     Once the cupcakes have cooled completely, slice the top and bottom halves apart.  Spread the frosting between the halves and on top.  I recommend using a piping bag-- it allows a thicker layer and looks prettier-- but you don't need one.  Top it off with a mint leaf.


     *I was unable to find mint extract at the grocery store I went to.  So I improvised and made some myself.  It was not the same as what you would get from the bottle, but it worked for this recipe.  Basically, I made a simple syrup by boiling a quarter cup of water and dissolving the better part of 1/8th cup of sugar in it.  I poured this over 2 or 3 sprigs of mint, mashed them a bit with the back of a spoon, and let it sit for about an hour or so (I went grocery shopping).  It gives a nice minty flavor, and works well in drinks, too.  I don't know how long it will last-- I used it up in 1 day, mostly in the recipe.  Because I don't know how it compares, strength-wise, to mint extract that you purchase, I sort of tasted everything I put it in and added more as I felt was necessary.

     I used Ghirardelli 60% cacao bittersweet baking chips for the recipe, which I thought melted VERY nicely.  Chocolate can be quite tricky, especially (in my experience) darker chocolate.  These not only melted beautifully, they taste excellent.  I happily noshed on the remaining 3/4 of the bag.

     I liked the cupcakes a lot; my roommate was a fan of them as well.  They weren't too boozy; actually, I wouldn't have minded more bourbon flavor in the cupcake.  The frosting I was able to adjust as I made it.  The cupcakes were quite dry, but that's probably because I baked them about half an hour (double the recommended time.)  I thought they looked underdone, and figured my oven must've been running cold (it was the first time I used it).  After a while, I noticed they didn't look that much different, and had the bright idea to actually TEST them.  (Whoa!!)  Buy then, alas, they were quite dry, but fortunately not burnt.  
     I thought the frosting recipe yielded an awful lot-- I ended up eating about half of it on waffles.  Next time I'll probably try leaving the cream cheese at a single (8 oz.) block, which I hope will give it a more whipped cream taste/texture and slightly decrease the yield.  
      I'll make these cupcakes again sometime, for sure.


Friday, September 27, 2013

Rhubarb Syrup

I was 16 before I encountered rhubarb in real life.  I'd read about it before-- most notably in Patricia Polacco's book My Rotten Redheaded Older Brother.  But that's beside the point.  Rhubarb is a fantastic vegetable.  I mean, how many other veggies do people bake with?  There's carrot cake, and I've seen a couple things with zucchini (anything to use them up!), but rhubarb!  Rhubarb makes excellent pie, cake, cobbler, jam, candies (In Germany you can get strawberry rhubarb gummies)...  The funny thing is, it's rather tart.  Or maybe that's why I love it so much.  As much as I love sweets, they're even better balanced with something tart (I feel this way about frozen yogurt as well, but again, I digress.)

     If you're unfamiliar with rhubarb, you should know that the leaves contain enough oxalic acid to produce toxic effects.  Don't eat the leaves.  The stalks also contain oxalic acid, but in lower amounts, so you can munch away at them, although you might not want to eat a whole garden in one sitting.  Interestingly, oxalic acid (in the form of calcium oxalate crystals) is also responsible for the toxicity of taro, the dietary staple of a number of Polynesian cultures.

Rhubarb Syrup
Rhubarb (I used about 4 stalks)
Sugar (I used about 3/4 C)
Water

     Clean the rhubarb, discard any icky or dried out ends (I find that by the time I get rhubarb home from the grocery store, the ends are a little shrivel-y).  Chop it into chunks.  This works best with a large and sharp knife.  Rhubarb can be surprisingly difficult to slice through.  Toss the rhubarb into a pot, and cover with water.  Dump in sugar (I do this rather indiscriminately) until you start seeing an accumulation of it that doesn't seem inclined to dissolve.  Turn on the heat, and bring the whole mess to a boil.  Reduce the heat and let it simmer about half an hour or so, until the rhubarb is tender, and the liquid has begun to thicken (it is a syrup!).  Taste test to make sure it is sufficiently sweet.  Simmer longer for thicker syrup.

      Strain the mixture into a container.  Use a sieve, pushing the rhubarb around to increase the amount of syrup yielded.  Set aside the rhubarb, too.  It makes a delicious ice cream topping!

      My favorite thing to do with rhubarb syrup is make rhubarb soda-- just put a few tablespoons of syrup in the bottom of a glass and add soda water.  The syrup is also great in cocktails or lemonade, and if you make it thick (I don't usually), it would probably be pretty good on pancakes or waffles.  I'm thinking I want to make a poundcake and soak it in the syrup, actually-- it won't be quite that simple, because that would ruin the texture (soggy poundcake... not so much).  When I get that figured out, I'll be sure to post it!

Friday, September 20, 2013

Radish-top Soup

'Tis the season for Farmer's Markets!  One of my favorite things to look at while at the farmer's market is radishes.  They are just beautiful.  Round, red, crisp, and leafy, rinsed and stacked up, they sit there and call to me.  Alas, I am not much of a radish fan.  However, Roots had some wonderful radish recipes, including one for a soup that uses the TOPS of the radishes (you know, the part that you throw out normally--yay complete eating!), so I couldn't resist.

Radish Top Soup
Radishes with fresh-looking, leafy tops
1/2 onion
2 or 3 stalks of celery 
2 carrots
2 medium-sized potatoes, peeled and finely chopped.
4 C broth*

      Begin by washing your radishes, including the greens.  Chop the greens off, discard any icky-looking ones, and set them aside for later.
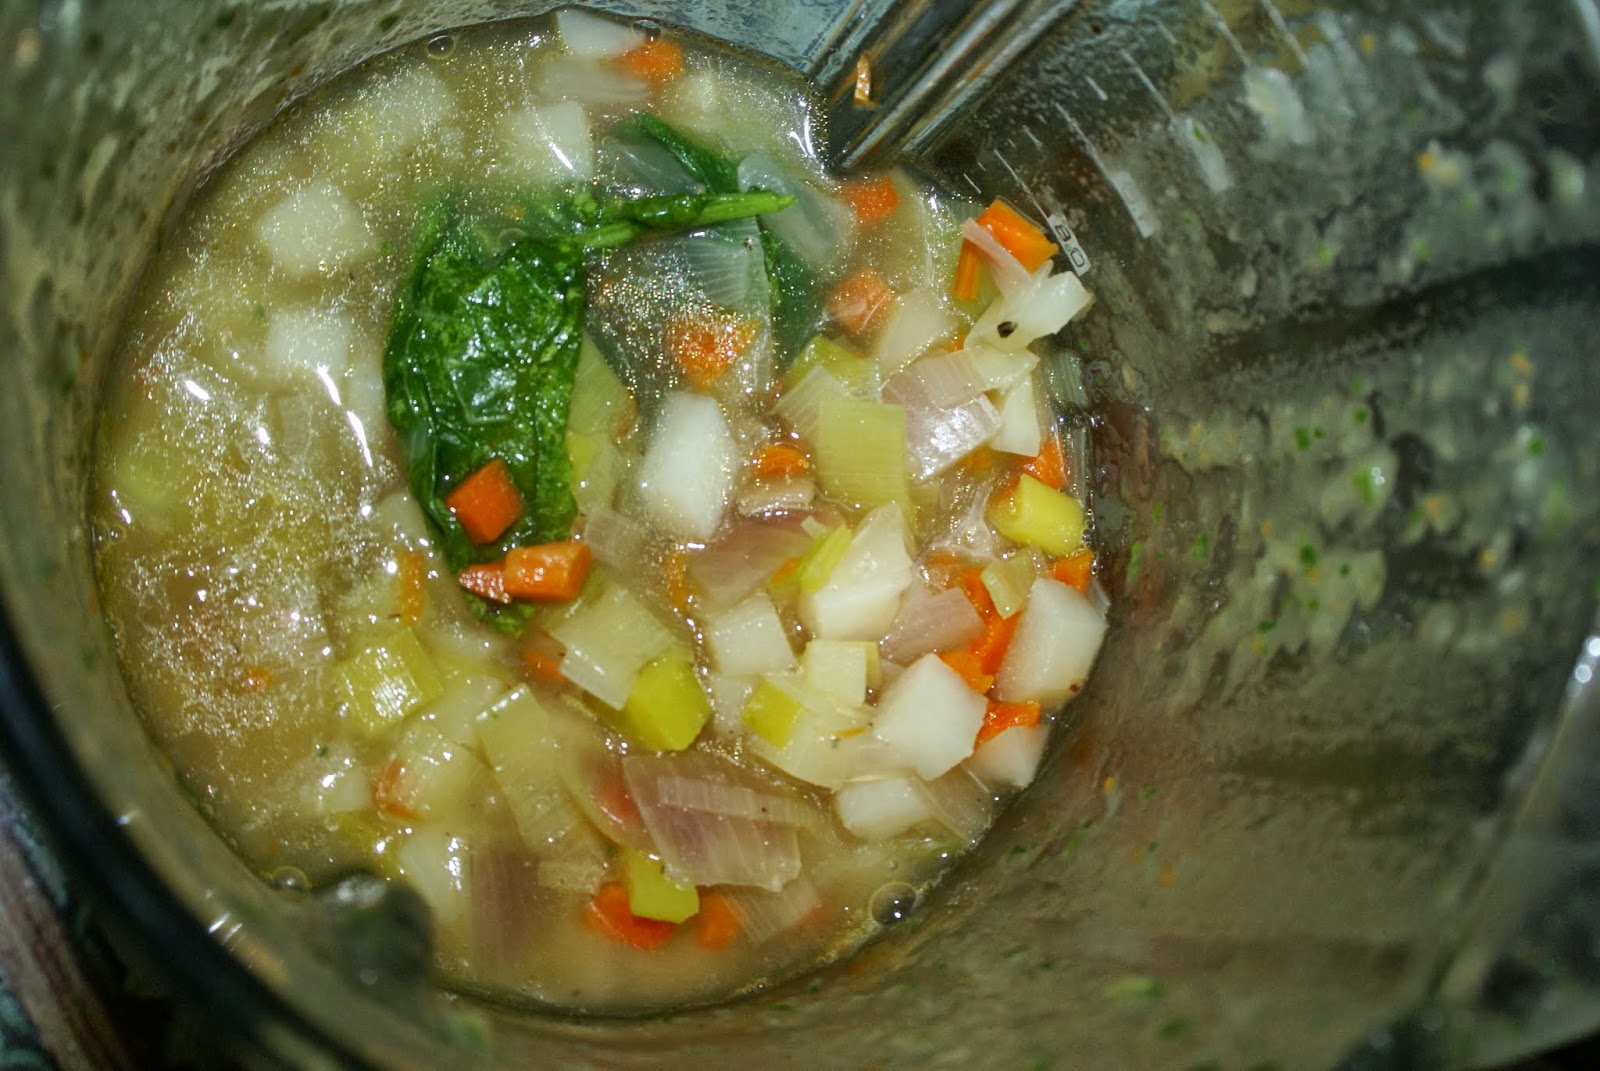
      Chop the onion, celery, and carrot.  In a large soup pot, sauté them in oil until they are slightly tender.  Add the broth, potatoes, and salt, and bring to a boil, and reduce to simmer.  Simmer until the veggies are completely tender, then remove from the heat.  Immediately add the radish greens-- the heat will cause them to wilt, and (without going too deeply into thermodynamics) the overall mix will cool (only slightly) as the energy is transferred to the leaves.  I think of this because it makes me feel better about the waiting I'm about to do:  you need the soup to cool to a manageable, won't-crack-cold-dishes temperature.
      Impatient cooks, do not despair!  While you're waiting for your soup to cool, start matchsticking those radishes.  I don't know if "matchsticking" is a real term, but basically you're going to slice the radishes into ~1/8th inch slices, then slice the slices into ~1/8th inch strips-- like little matchsticks.
      Hopefully by the time you're done, your soup is relatively cool.  When it is, pour it into a blender or food processor (you may have to do this in batches), and blend/process until smooth.  Return the soup to the pot and gently re-heat.  Season to taste with salt and pepper.  Serve topped with those matchsticked radishes.

*Note on broth:  I used a bacon broth leftover from another recipe for a warm lentil and bacon salad (I'll post it as soon as I can find my recipe again; there are some measurements I don't remember.)  You can probably use any broth you want (keep it vegan, if you like), but I really felt the bacon flavor added something.

     My whole family enjoyed this soup.  They looked at me funny when I said, "radish tops", but they were all really pleased with the flavor.  The potatoes give the soup a wonderful creaminess that I hadn't expected, and those radish matchsticks added as a garnish provide a nice contrast with their crispness and sharp flavor.  I added leftover matchsticks to the leftover soup prior to storing it; I recommend against this, because they lose their crunch.  
     As I said above, I think a large part of what made this recipe so wonderful was the hint of bacon my broth imparted.  The take-home there, though, might be just to choose a broth with a flavor that you really like, and that will come through well.  If you have the best-ever chicken or veggie broth, by all means, use it.  You probably won't be disappointed.  
     Overall, I really felt that there was an elegance to this recipe as well as a fantastic flavor.  It comes from the presentation (those matchsticks!), but also from how well the ingredients are used.  The concept of using the greens gives a bit of novelty, and the creaminess attained without using cream is beautiful.  It is filling enough to make a meal when served with bread, but light enough to make a soup course (if you ever feel the need to).  I love this recipe even more after making it than I did before I started.


Sunday, September 1, 2013

Make-it-up-as-we-go Manicotti

Oh, pasta, where would we be without you?  A silly question, I suppose, but I know that I grew up eating a lot of pasta.  It's cheap, it's quick, it's easy.  It goes with just about anything.  You can leave a 10-year-old to make it herself, "just follow the directions on the box and be careful not to burn yourself."  (Assuming the 10-year-old in question has spent a lot of time helping and/or getting underfoot in the kitchen.)   It's an excellent go-to when one has no plans for dinner/forgot to thaw the meat.  Which is how my mother and I wound up making manicotti recently.
There are a lot of manicotti recipes out there.  There's usually one printed on the side of the box.  My mom has a vague idea what her mom used to put inside those noodles, so after frowning at the side of the box for a while, "There's no egg listed here.  My mother always used egg," she decided to improvise, and I somehow wound up in the kitchen with my camera and my 2 cents to put in.  In the recipe below, my mom is responsible for the almost obscene amount of basil.  We have a very large, healthy basil plant in our herb garden; Mom must've pruned the thing.  I swear, she brought in enough to make pesto.  (Pesto-topped manicotti strikes me as a cool idea, actually, but I don't think she was feeling that experimental.)  I decided to sauté the onion and garlic so they'd have a milder flavor. We got to work, and this is what we came up with.

Basil Lover's Manicotti
1 box manicotti noodles (check to make sure they aren't broken)
1 container (16-ish oz?) ricotta cheese
1/3 C grated mozzarella
1/4 grated parmesan 
Salt and Pepper
1/4 C Onion, diced
1 clove garlic, minced
2 Tbsp Olive oil
Fresh Basil, about 1/4 cup chopped 
1 Egg
Tomato Sauce

Preheat the oven to 350 Fahrenheit. 
Boil the manicotti in salted water, referring to the box for the correct cook time.  
Meanwhile, combine the ricotta, mozzarella, and parmesan.  Briefly sauté the onion and garlic in 1 Tbsp olive oil, until they are just barely starting to brown.  Add that to the cheese mixture, along with most of the basil (reserve about 1 Tbsp for later).  Season to taste with salt and pepper, then add the egg.  (I do try to minimize the amount of raw egg I consume.)  
Grease a wide, shallow pan (a 9x13 baking pan or a gratin pan if you have one) with the remaining Tbsp of olive oil.  
When your noodles are done cooking, drain them, and immediately rinse them with cold water.  This prevents them from sticking to each other, and cools them to a temperature that your fingers can handle.  Stuff each noodle with the cheese mixture.  I like using my fingers for this, because I feel that I have more control that way.  If you're a utensil-user (not everyone likes having dirty fingers, I get it), my mom recommends using a fork rather than a spoon.  It's easier to detach the filling from a fork.  Arrange the stuffed noodles in a single layer in the greased pan.  I usually wind up with a leftover noodle or two, which makes me happy, because for whatever reason, I absolutely love eating manicotti noodles plain.  Or you can put slightly less filling in each noodle, and probably arrange them a little tighter, but I wouldn't want to do that.  Cover the noodles with tomato sauce.  You can drown them if you like, but all you really have to do is make sure each noodle gets its fair share.  Sprinkle the remaining basil over top, and bake for about 40 minutes.

It was pretty good.  You have to like basil, for sure, but fortunately, my family members all do.  Manicotti is great because it is moist and, when done right, flavorful.  This recipe was no exception.  If I were to make it again, I would probably incorporate a finished pesto, and probably use more mozzarella, because I love the gooey, stretchy texture that cheese has.


Saturday, August 31, 2013

Kartoffelpuffer, Latkes, or whatever else you like to call 'em

Potatoes are a wonderful food source.  They're one of the largest food crops in the world (along with rice, wheat and corn).  They're pretty easy to cultivate (I managed to grow a potato plant in a dorm room), filling, and tasty.  Although native to the Americas, they feature in cuisines from around the world. 
I ate a lot of potatoes when I lived in Germany.  Germans, although more famous for their beer and sausage, do a lot of potato-eating.  One of my favorite ways to eat them was as a pancake.  My family always called them "Kartoffelpuffer" ("Kartoffel" being the word for "potato"), although they were also commonly referred to as "Reibekuchen" (literally: "grated cakes").  The first time we made them, I bit into mine and said, "Oh!  It's a latke!" because the only time I'd ever had them previously had been during a Chanukah thing.  Technically, a latke can be made without potatoes (they've been around a lot longer than potatoes have been available to Jewish communities), but most people really like fried potatoes, and, as I said above, they're a great food source, so why not?

Kartoffelpuffer
~1 lb potatoes 
1 small onion, diced
1 large egg
~2 Tbsp bread crumbs 
Salt and Pepper
Oil (for cooking)

Peel and grate the potatoes.  If you prefer to leave the skin on your potatoes, feel free to do so; just be sure that all the skin gets grated and you aren't left with large sections of it.  Combine with the other ingredients, stirring it to mix thoroughly.  Here's the tricky bit: you have to wait.  I am an impatient cook, so I always mix everything together, look at it, and freak out.  When first combined, everything is loose, resembling a salad more than a batter.  Give it some time to sit though, and liquid will be pulled out of the potatoes.  Stir periodically until you start to notice a batter-like, cohesive consistency (shown at right).  In the mean time, heat your oil/pan/griddle.  My recipe says to cook them like pancakes, but when I'm making pancakes, I use a lot less oil.  Grease your pan or griddle generously; you can even shallow-fry these (which is more in keeping with the Jewish latke tradition).  
Scoop a portion of the potato mixture into the oil.  If you need to, spread it to about 1/2 uniform thickness.  Fry/cook over medium heat until the edges are set and slightly browned; flip the latkes and cook until both sides are browned. Be aware of how much oil the pancakes absorb-- you may need to re-grease the pan when you flip.  Work in batches until all the potato batter is used up.  Serve while warm (fresh out of the pan is best).  My family in Germany eats them with applesauce; they're also delightful with sour cream, cottage cheese, apple butter, or any combination thereof.  

Notes:  If you are terribly impatient like me, you might add a 2nd egg to get to batter-like consistency faster ("It's too dry!").  If you opt to do this, be prepared to add more bread crumbs or flour as the liquid is drawn out of the potatoes.  Even without adding an extra egg, you may find it useful to have flour around-- potatoes hold a lot of water.

When greasing the pan, I used about 1 Tbsp of bacon fat and 2 Tbsp of canola oil at the beginning of each batch.  Bacon fat just gives such a lovely hint of flavor.

If you're having trouble with the pancake deforming as you try to scoop it up and flip it, that's probably it's way of saying that it is not done cooking on that side.  If it breaks, then it is sticking to the pan.  But I found that usually it seemed sticky because it was under-cooked.  No worries if you realize the problem after flipping.  Just let it finish cooking on the 2nd side, and flip it back to the first side.  And try to be more patient next time.  It's hard, I know.

These are oily.  That's why they're eaten at Chanukah-- it's all about the oil.  I recommend draining them, though, if you aren't going to immediately devour them.  Crumple some old newspaper and cover it with a clean paper towel, and place the pancakes on that to dry.  (See photo, left)  Newspaper soaks up the oil nicely, and it's a bit cheaper than a roll of paper towels.


Wednesday, August 14, 2013

Moroccan Style Chicken

I found this recipe in my local newspaper.  I like the idea that when I make it I'm getting a little taste of Casablanca.  I like the flavors used in it, warm spices that mingle with the smoke flavors from the grill.  The use of yogurt is also fantastic, taking advantage of the enzymes and bacteria (friendly bacteria) present in yogurt to make the meat tender and moist.
By itself, the chicken is also a great recipe for people who come home and don't necessarily have time to prep a meal.  Because the chicken has to sit for a long time in the yogurt, it's best prepped in the morning, and then you can just come home and cook it, which takes maybe 15 minutes.
To accompany it, I made a lentil salad, inspired in part by a recipe I came across a while back for an Egyptian bean salad, which used similar flavors.

Moroccan-style Chicken Breasts
3 large boneless, skinless chicken breasts
1/3 C plain nonfat yogurt
1/3 C chopped fresh cilantro
1 Tbsp olive oil
1 Tbsp minced garlic (~2 cloves)
1 tsp sweet paprika
1 tsp cumin
1/4 tsp salt
1/4 tsp pepper

Combine the yogurt, cilantro, oil, garlic, paprika, cumin, salt, and pepper, and smear the mixture over both sides of the chicken.  Place the chicken in a dish and cover it, placing it in the refrigerator and allowing it to sit for 6 to 10 hours.
Preheat a gas grill to high, or prepare a charcoal fire.  Grill the chicken until cooked through, about 5 minutes/side.

I used culantro rather than cilantro (see my blog on Enchiladas for a brief discussion of these herbs), because I have some growing in my garden, and it lends itself particularly well to marinades.  While this yogurt mixture is not a typical marinade, it is largely cooked (burnt or melted, I guess) off during the grilling process, so I wasn't stuck with a bunch of culantro leaves poking my gums and tongue as I ate (a less than pleasant sensation).
Generally, I don't go for non-fat yogurt, but this time it just so happened that that was all my grocery store had.  I was less than thrilled; I'm sure the recipe would work just fine with regular yogurt.

Lentil Salad
1 C dried Lentils
1/4 C chopped onion
1 clove garlic, minced
1 kosher dill pickle, chopped
1/2 C plain nonfat yogurt
paprika, cumin, salt, and pepper

Rinse the lentils and place in a pot with about three times as much water as lentils.  Bring to a boil, and reduce to a simmer.  Allow the lentils to simmer for ~25 minutes until soft, but not mushy.  Drain any excess water, and add the onions and garlic while the lentils are still hot.  After allowing them to cool a bit, add the pickle and yogurt, and season to taste.

I will admit, this salad is not the most attractive thing that has come out of my kitchen.  But it is wonderfully flavorful.  Is served it alongside the chicken.  The onion and pickle gave it a little distinction flavor-wise from the chicken, which was good.  Although I use the same spices, I do want different flavors in my food.  Just not competing ones. 
Leftover lentil salad and chicken can be combined to make an excellent chicken salad for a sandwich or wrap (see photo, left).  I recommend it with some feta cheese.